
How to use the WordPress.com Calypso interface on the open source version of WordPress.org
On November 23th 2015, WordPress unveiled Calypso. Calypso is the new WordPress.com admin interface that allows you to manage your WordPress.com blog. Calypso comes with a desktop app (currently only for Mac, but the Windows and Linux versions are coming soon) and also lets you follow your favorite websites, which basically means that you can get rid of your RSS reader. The most important feature of Calypso is that it’s completely written in JavaScript which makes it a lot faster than the previous admin interface (which ran on PHP and MySQL). More specific, front-end of Calypso is written in a JavaScript framework called React, and for the backend they used the server-side platform called Node. In practice, this means that pages don’t have to reload after each action, which we think is awesome.
Use Calypso on WordPress.org
You can still enjoy the WordPress Calypso interface if you’re running a self-hosted version of WordPress.org, the open source version. All you need for that is a WordPress.com account and the Jetpack plugin (which both are free). After installing and activating the plugin, you’ll need to login with your WordPress.com account and turn the ‘Manage’ setting on, it’s that simple. You’ll find the necessary steps below:
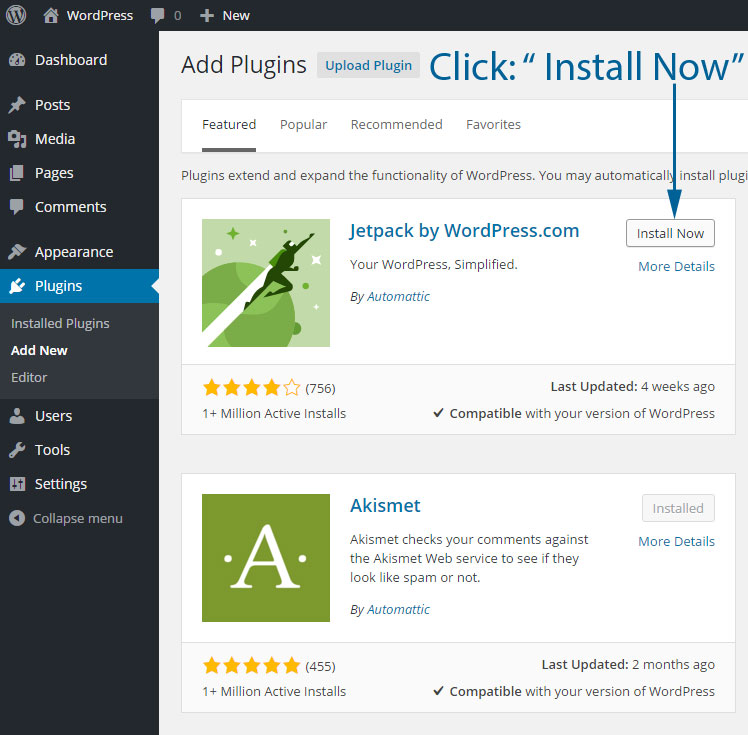
Step 1 - In your admin panel, click ‘Add New’ from the Plugin section in the left menu. Search for the ‘Jetpack by WordPress.com’ plugin and click the ‘Install now’ button.
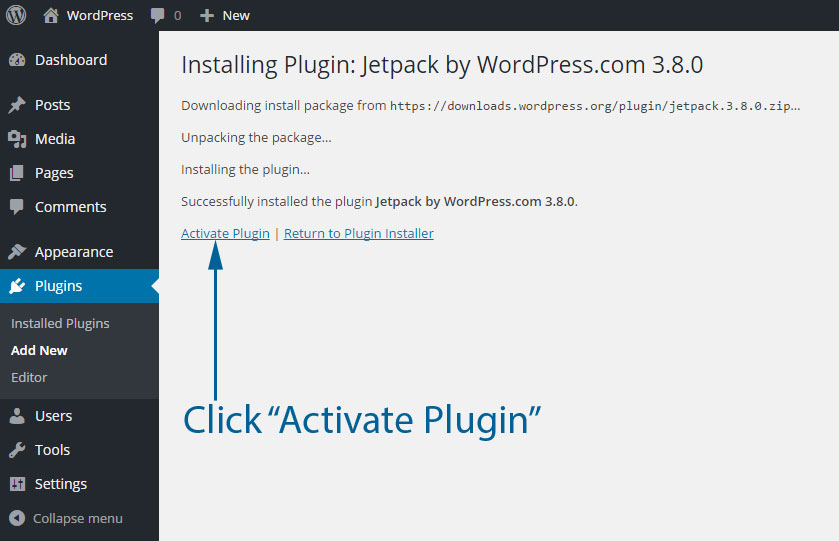
Step 2 - After installing the plugin succeeded, you’ll see a blue ‘Activate Plugin’ link. Click that link to activate the plugin.
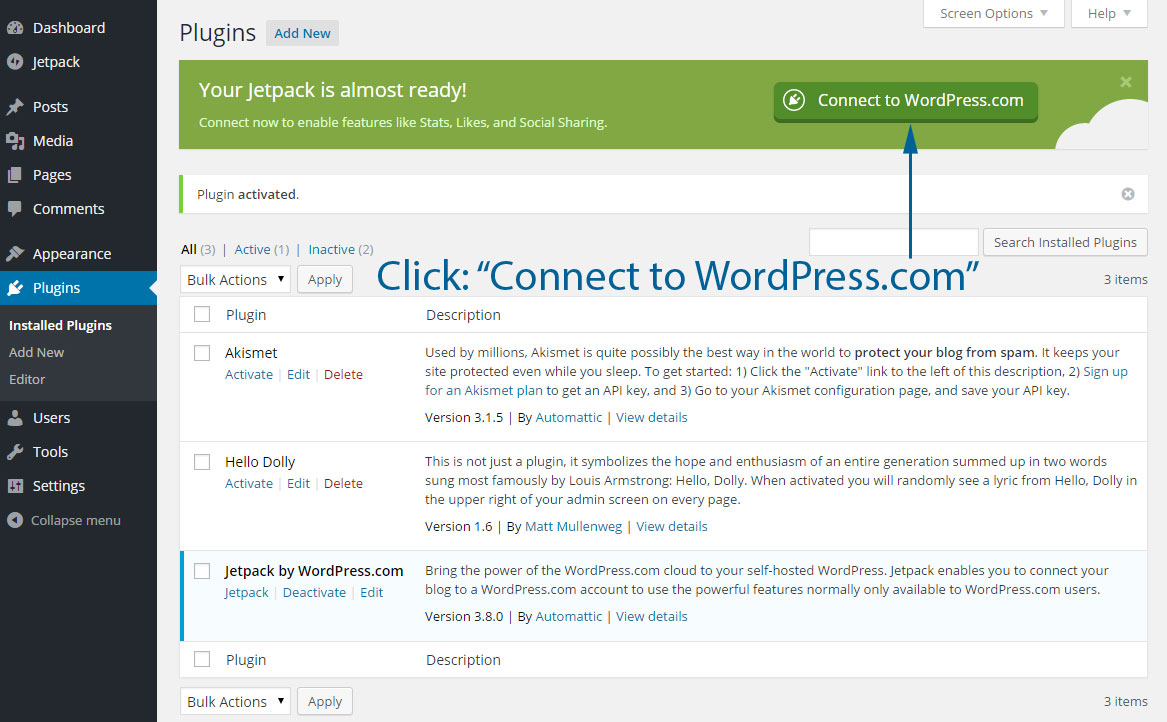
Step 3 - After activating the plugin, you’ll be taken to the page where all plugins are listed. On that page, you’ll see a big green block with a dark-green ‘Connect to WordPress.com’ button. Click that button and login to your WordPress account (or create a new account).
Step 4 - After you’ve logged in, the Jetpack plugin asks you if you want to Jump Start your site. If you click the blue ‘Jump Start’ button, some default featured will be turned on. One of these features is the ‘manage’ feature. This is the feature you need to be able to manage your WordPress website via the new Calypso interface.
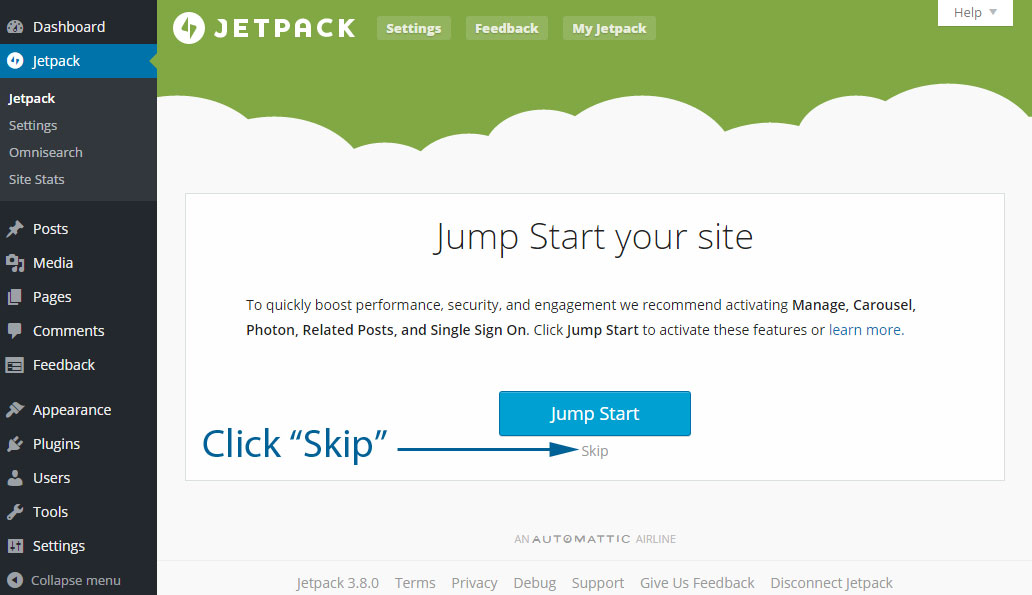
Step 5 - Assuming you don’t want to automatically activate all default features, click ‘Skip’ and you’ll be taken to a page where you can activate the features that you want.
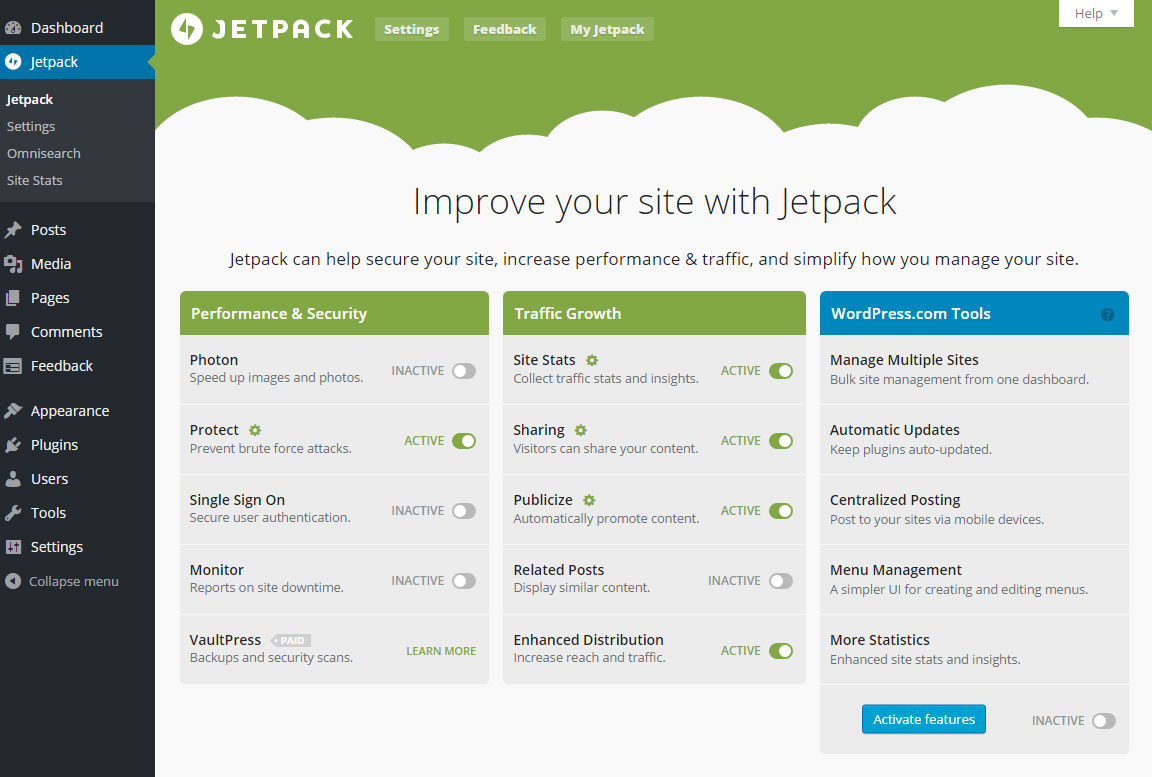
Step 6 - After selecting the features that you want, check the bottom right checkbox next to the blue ‘Activate features’ button.

Step 7 - After you’ve clicked the check besides the blue ‘Activate features’ button, you’ll notice that the button text changes into ‘Go to WordPress.com’. Click the blue ‘Go to WordPress.com’ button and a new tab will open. You’ll be taken to WordPress.com.
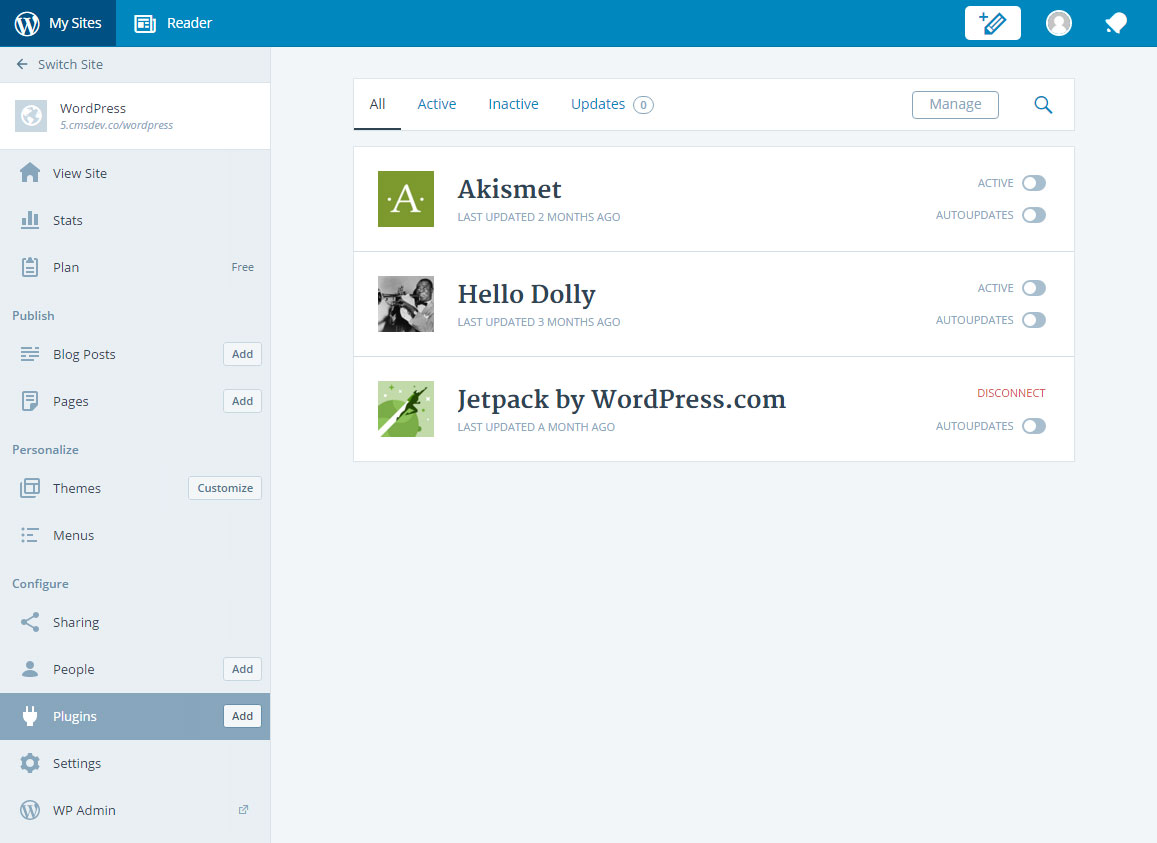
Now you are able to manage your self-hosted WordPress.org blog via the WordPress Calypso interface, from within your browser or using the desktop application.
Was this useful?


Resource categories
Share this resource
