
How to move a WordPress site to a new server/domain
Upon the PSD to WordPress project delivery, a major part of our clients decides to appeal to us to move their custom built Wordpress website from our development server to their client server, of course all free of additional charge. However, clients who decide to deal with the move themselves will be sent a zip file containing the website files and the .SQL database.
This manual describes the move and installation of a Wordpress website on a new server whereby the owner disposes of or has access to the website files and the corresponding database. When one uses this manual it is of main importance all steps are carefully and chronologically carried out.
This manual can also be used to move a Wordpress website from a sub-domain or sub-page (blog.example.com or example.com/blog) to the main domain or another domain (example.com or example.net), or vice versa.
How to move WordPress site in 6 steps
Haven’t you backed up yet the website files and database which you would like to move? In that case, please start with step 1. Have you already backed up the website files and .SQL database? Please proceed to step 3.
-
Back up the website files:
Make a back-up of the website you would like to move. Log in via FTP with an FTP program like FileZilla or SmartFTP and copy all files and folders to a folder on your PC.
-
Back up the database:
Make a back-up of your database. Go to your database (often website.com/phpmyadmin) via your browser and export the database in .SQL format to the folder where you have also backed up the website files/folders.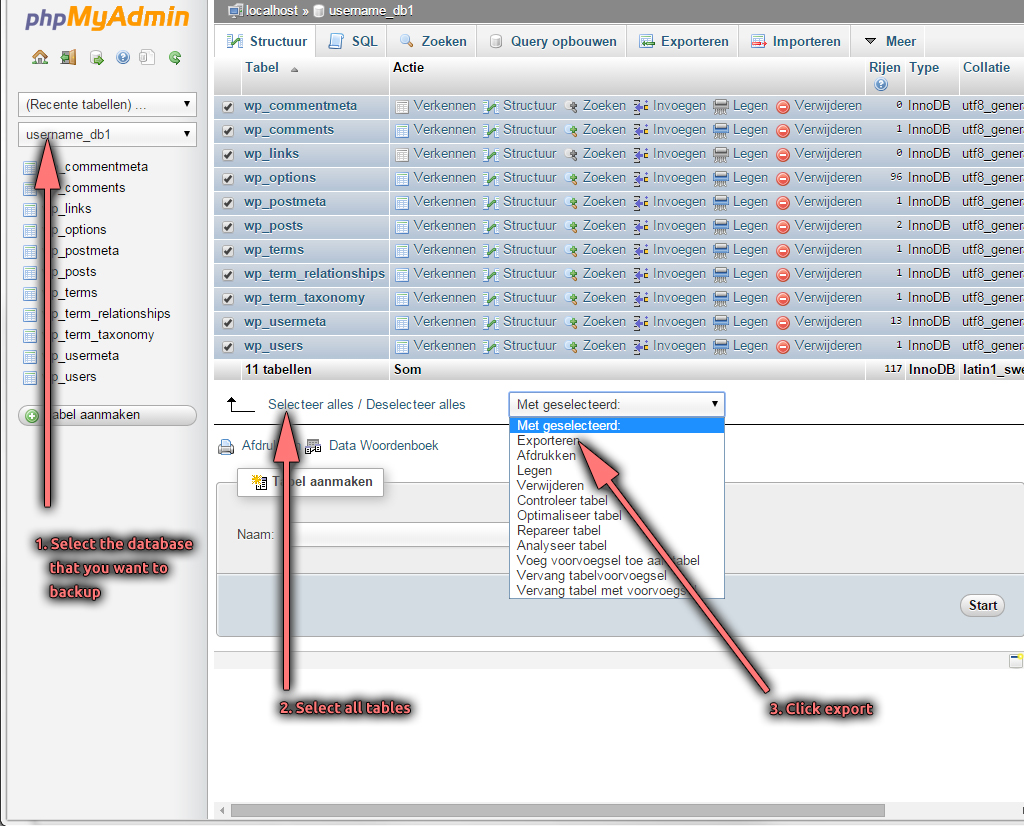
Click the 'start' button to export the database.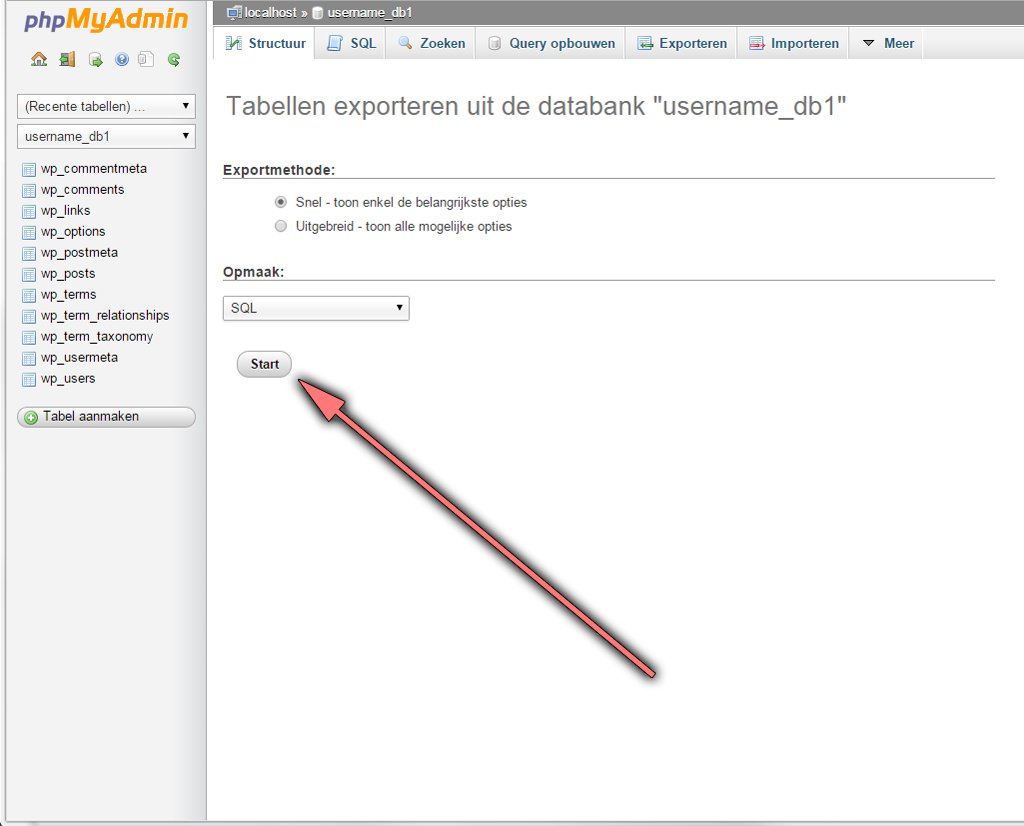
When your website and database have been backed up, the website and database can be moved to the new server. Make sure you have the FTP and database login details of the new server at hand. -
Set-up the configuration:
To make sure the website can be connected to the database, the logins of the new database need to be inserted in the wp-config.php file. Go to the folder on your PC where you have backed up the Wordpress website and open the wp-config.php. Replace the current database details with the new database details in the wp-config.php and save the file.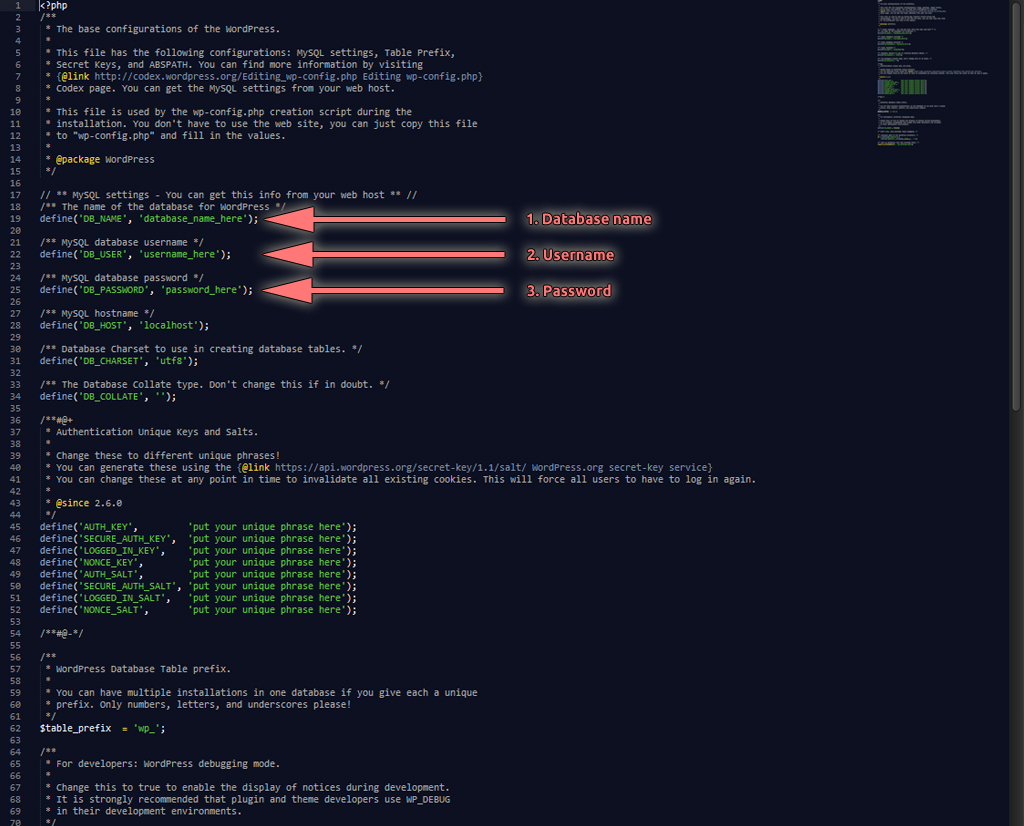
-
Upload website files to the server via FTP
To be able to upload the website files to a new server, one needs to log into the new server via FTP, open the public-html folder and erase the content in this folder.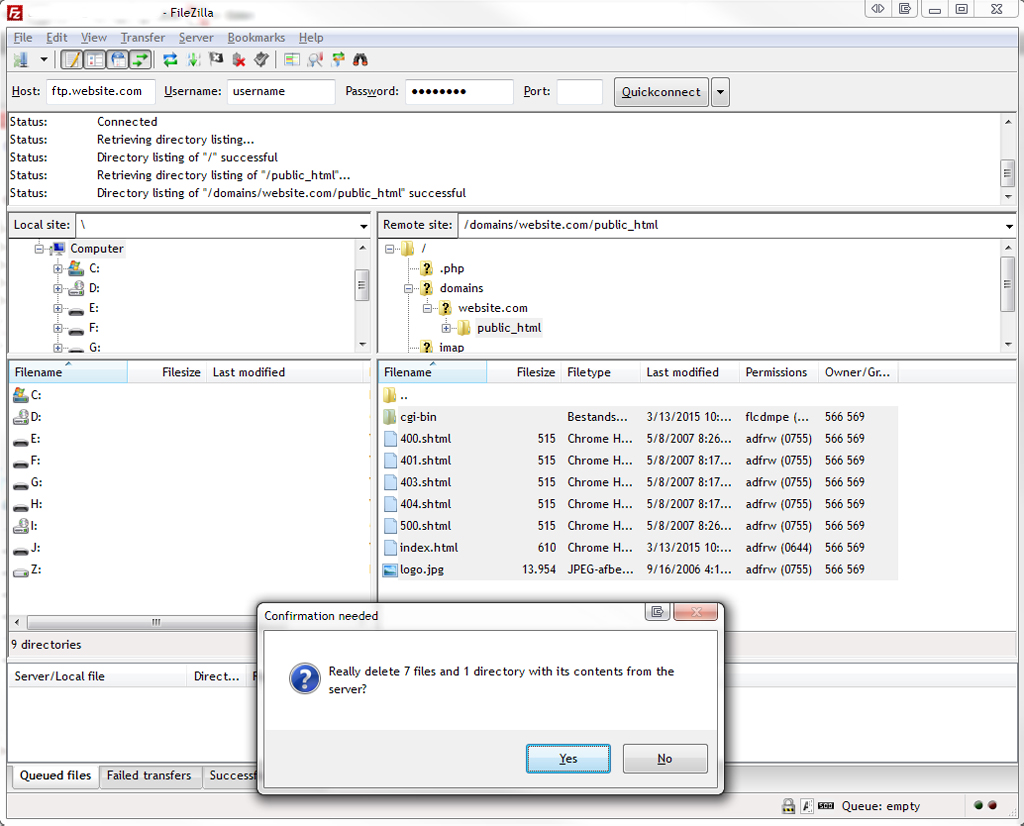
Next, all files and folders which have been saved in the folder where you have backed up the website need to be selected after which these files need to be uploaded via FTP to the empty ‘public-html’ folder on the new server.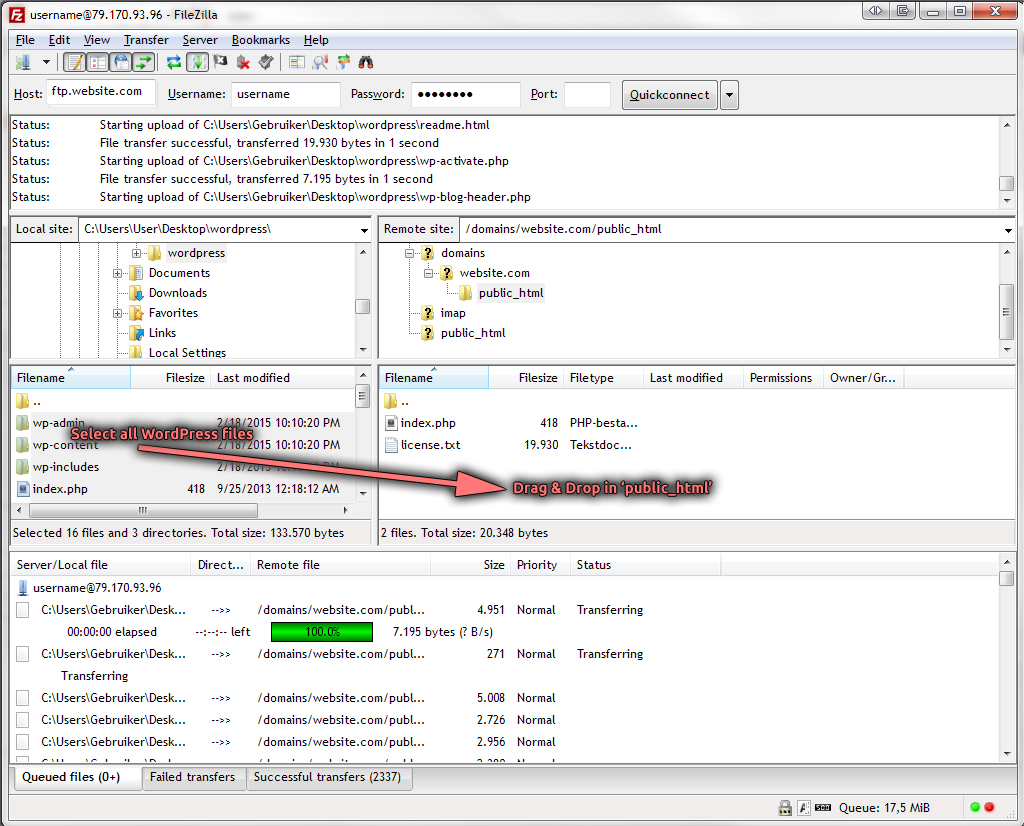
-
Adjust URLs in the database:
Open the backed up .SQL database by means of a text editor or notepad and replace all old URLs with the new website URLs (for example replace http://devserver.com to http://yourwebsite.com/)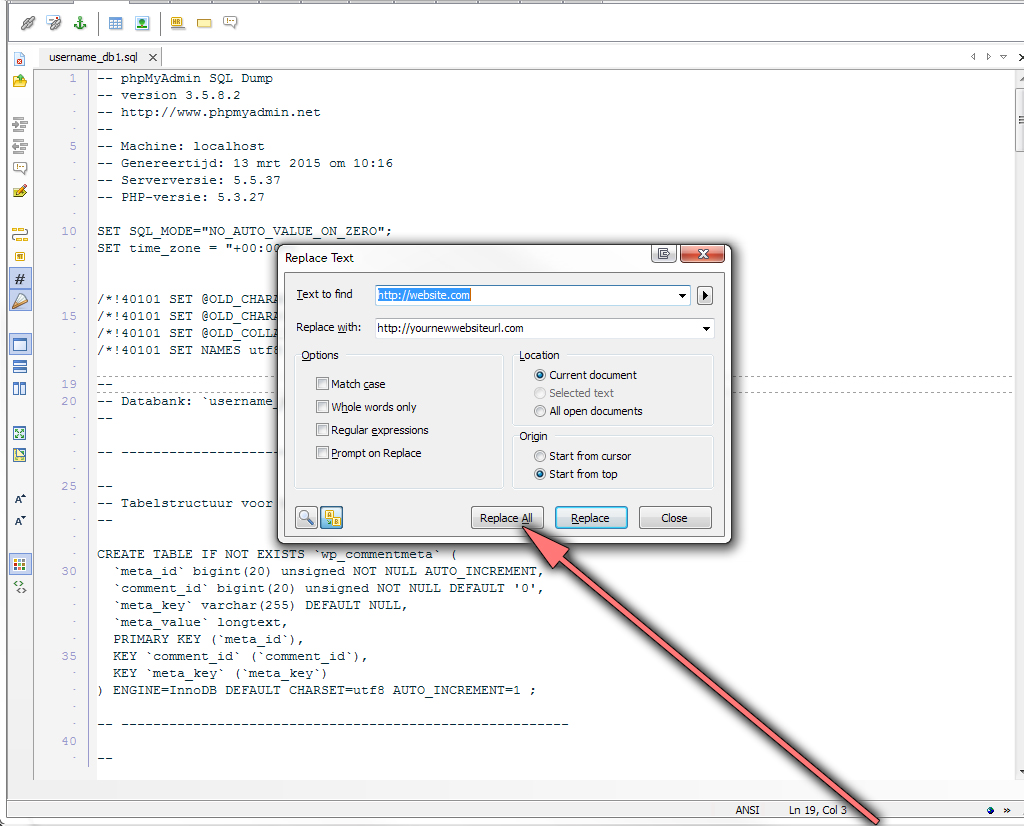
-
Import the database:
Log into the new database (often named website.com/phpmyadmin) and import the previously mentioned adjusted .SQL database.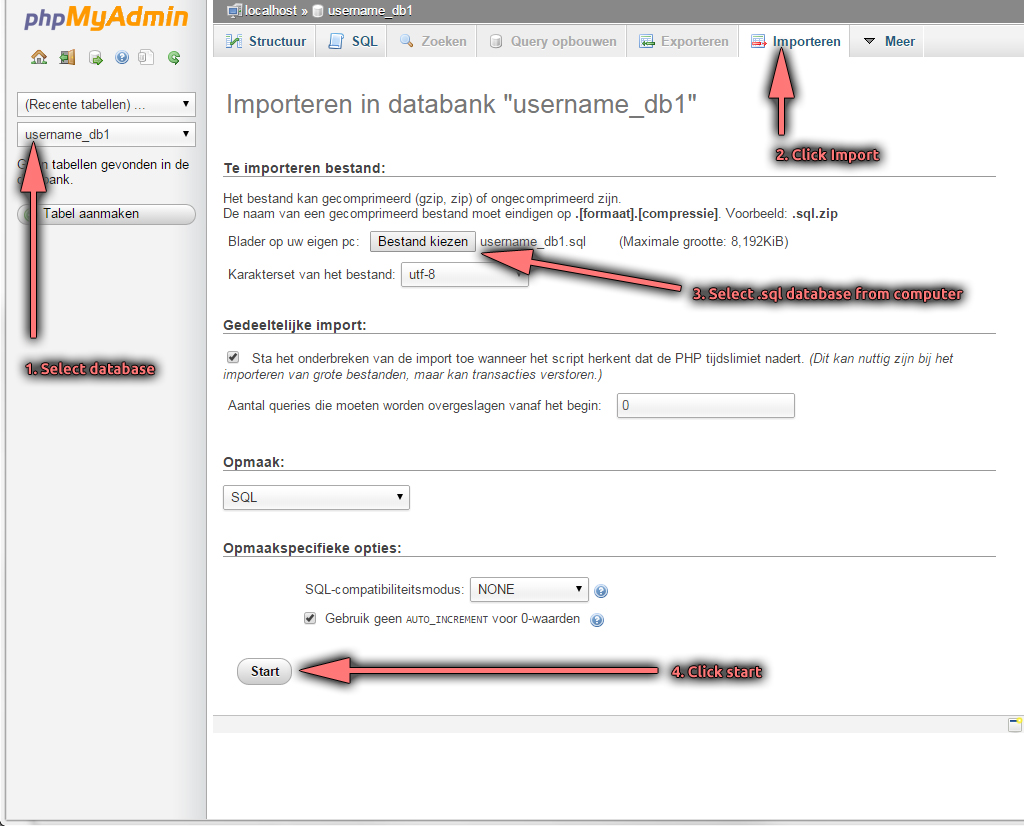
Upon completing this last step, the move and installation of your Wordpress website can be considered final. When browsing to the new URL, the website should now function properly.
We sincerely hope this manual will help you moving your Wordpress website to a new domain. We would highly appreciate all of your feedback about his manual and we would be happy if this manual could be shared via your website or by one or more of your social media channels.
Was this useful?


Resource categories
Share this resource
