
How to add custom CSS in WordPress
CSS, or cascading style sheets, are used to position and style HTML elements. If you create a custom WordPress theme, you’ll notice that the theme won’t even work if you don’t include a style.css in the theme folder. It happens that you want to adjust the style/CSS of certain elements of your website. Before we deep-dive into adding custom CSS in your WordPress theme, you need to be aware that many WordPress themes use the same styles to style or position multiple HTML elements. A small change might look great on one page, but might at the same time break a dozen other pages. Always make sure that you create a backup before you start editing existing CSS, or just create an extra stylesheet so your edits can easily be removed/adjusted. Now let’s focus on the question ‘How to add custom CSS in WordPress. We can state that there are two ways to add custom CSS in WordPress, via the WordPress admin panel or via FTP.
Add custom CSS via the WordPress admin panel
Add custom CSS in WordPress via the admin panel is a nice feature, but there are some limitations. Firstly, you’re limited to the text editor in WordPress, which basically only is a textarea without any options. Therefor you can’t open the CSS file in your text editor which will slow you down, lets you make mistakes way faster and doesn’t offer you the ‘redo’/backup function. A second limitation is that you won’t be able to edit stylesheets that are placed in folders.
Step 1 - Login to the admin panel and click in the left menu on ‘appearance’ (or hover above it), and click ‘editor’ in the sub-menu:

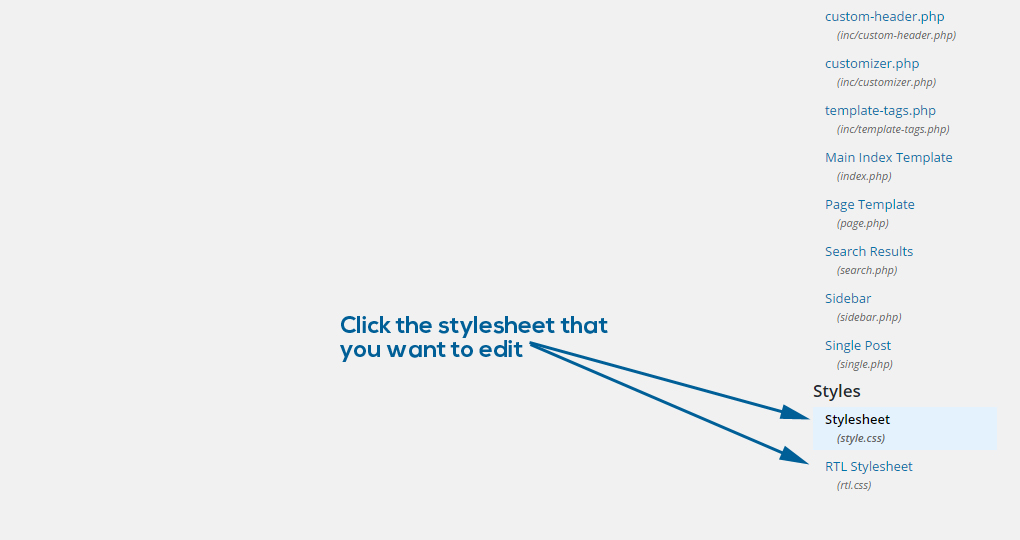
Step 2 - You’ll probably directly see the stylesheet. If not, scroll all the way down and look for the bottom right section of the page. Editable stylesheets will be listed below the template files:
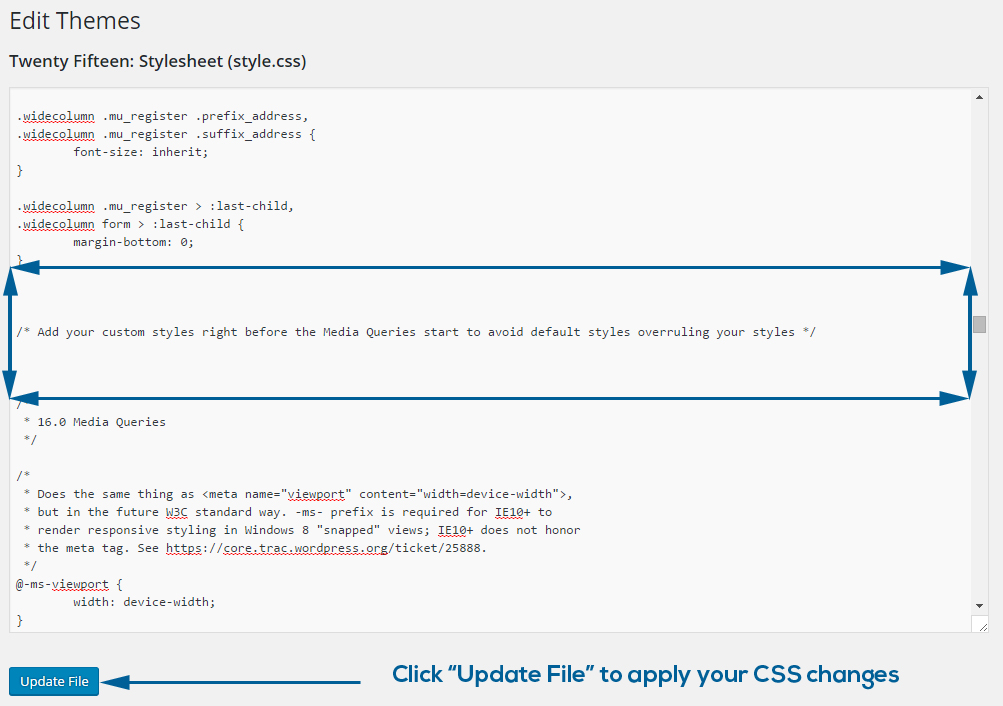
Step 3 - Once you’ve got the stylesheet that you want to edit, scroll down to the place where ‘normal styles’ end and the media queries start. You add your custom CSS right in between and click ‘Update File’ to apply your custom CSS changes:
Adding your custom CSS in WordPress is ready now. Reload the website to see your custom CSS appear.
Add custom CSS in WordPress via FTP
This method is (by developers) by far the most popular way because you can directly open the stylesheets from your server into your text editor. Saving a stylesheet will simultaneously upload the new version to your server so all you need to do is hit F5 in your browser to see the changes popup. It really isn’t hard to add custom CSS via FTP to your WordPress theme if you follow the following steps.
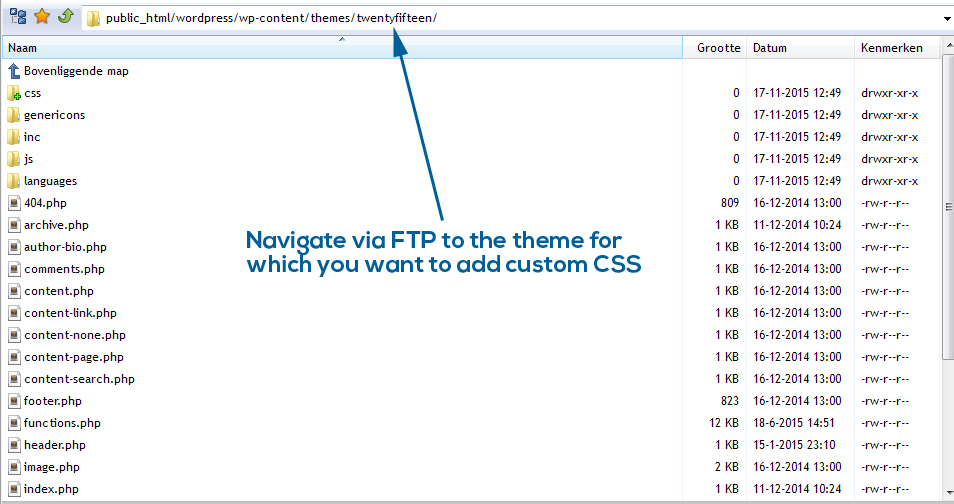
Step 1 - Log into your server via FTP and navigate to the theme (/wp-content/themes/theme-name/) for which you want to add custom CSS:
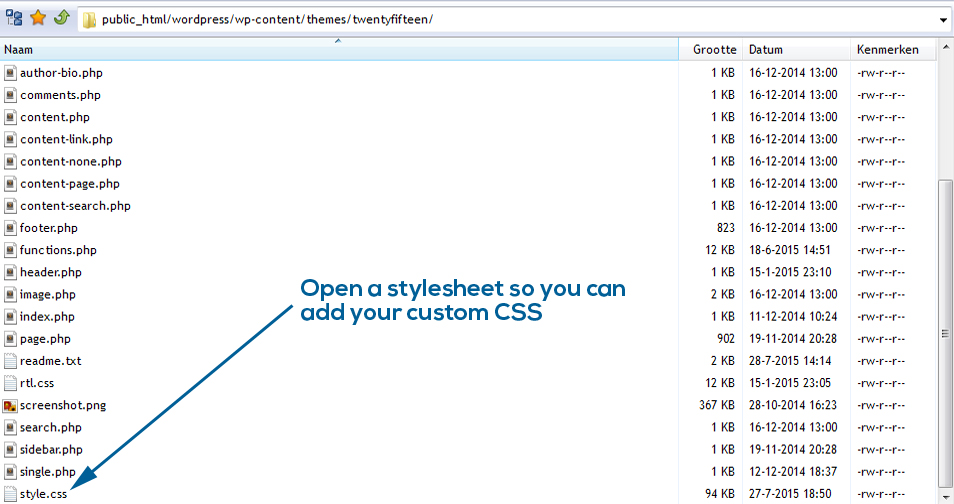
Step 2 - Locate the stylesheet that you want to edit and open it in your editor (or just download it and open it in a program like notepad):
Step 3 - Add your custom CSS right between the CSS for the ‘normal styles’ and the CSS for responsive behavior (media queries) and save your changes by uploading the edited stylesheet:

The custom CSS you’ve added will now become visible once you reload the website.
Was this useful?


Resource categories
Share this resource
