
How to install a WordPress theme
The beauty of WordPress is that you can easily change your website’s appearance by changing the theme. There are thousands of WordPress themes available, both free and payed. If you can’t find the right theme for your website, you can always develop an unique WordPress theme. Before we dig into how to install a WordPress theme, we first need to distinguish the difference between uploading and installing a WordPress theme via the WordPress admin panel, or via server upload (FTP).
This tutorial will distinguish three ways on how to install a WordPress theme. The first way is by installing the WordPress theme directly from the theme catalog in the admin panel. The second way is by uploading and activating a WordPress theme via the admin panel and the third and last way is by uploading a theme via FTP and activating it in the admin panel.
How to install a WordPress theme via the admin panel
WordPress.org has its own theme catalog, in which you find a lot of free to use WordPress themes. You can download the themes by going to the WordPress.org website, but it’s easier to just login to the WordPress admin panel, go to Appearance - Themes - Add new, find the WordPress theme you want and click the blue ‘Install’ button. After installing, you’ll be taken to a page where you need to activate the theme. This doesn’t require you to upload anything via FTP so everyone can change the theme. Here are some screenshots that show you exactly how to install a WordPress theme via the admin panel:
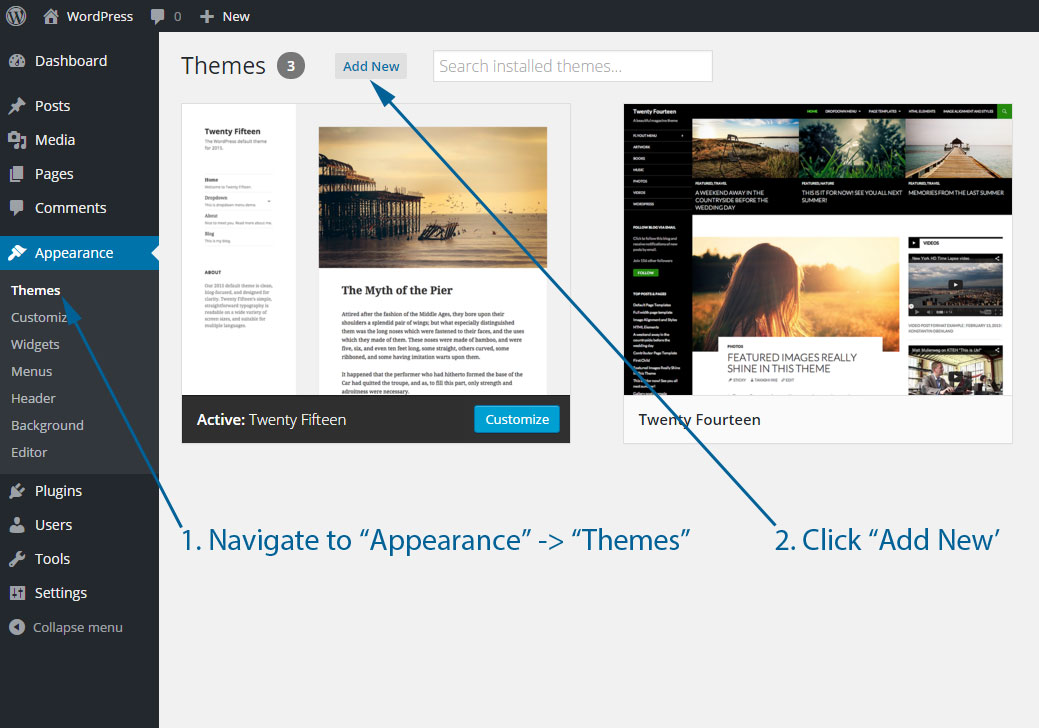
Step 1 - Login to the admin panel, and navigate to the themes section, where you click ‘Add new’:
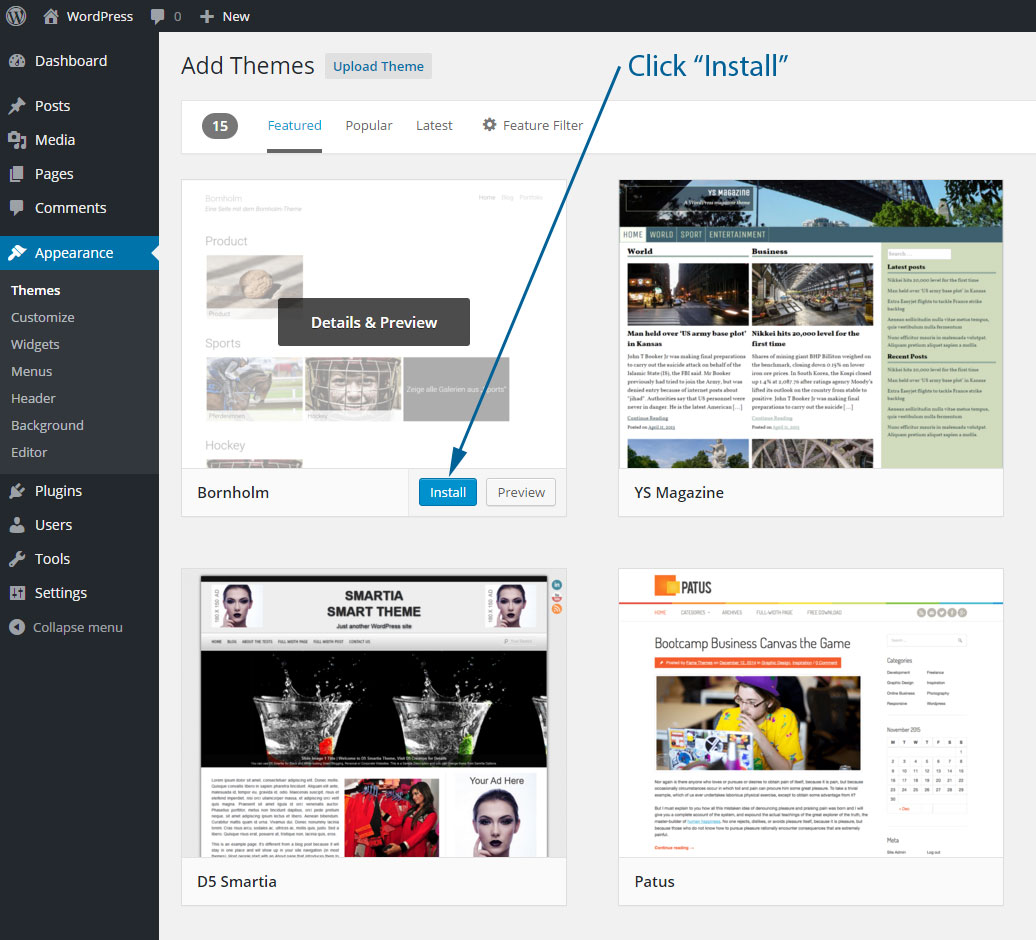
Step 2 - Find the theme that you want to install and simply click the ‘Install’ button:
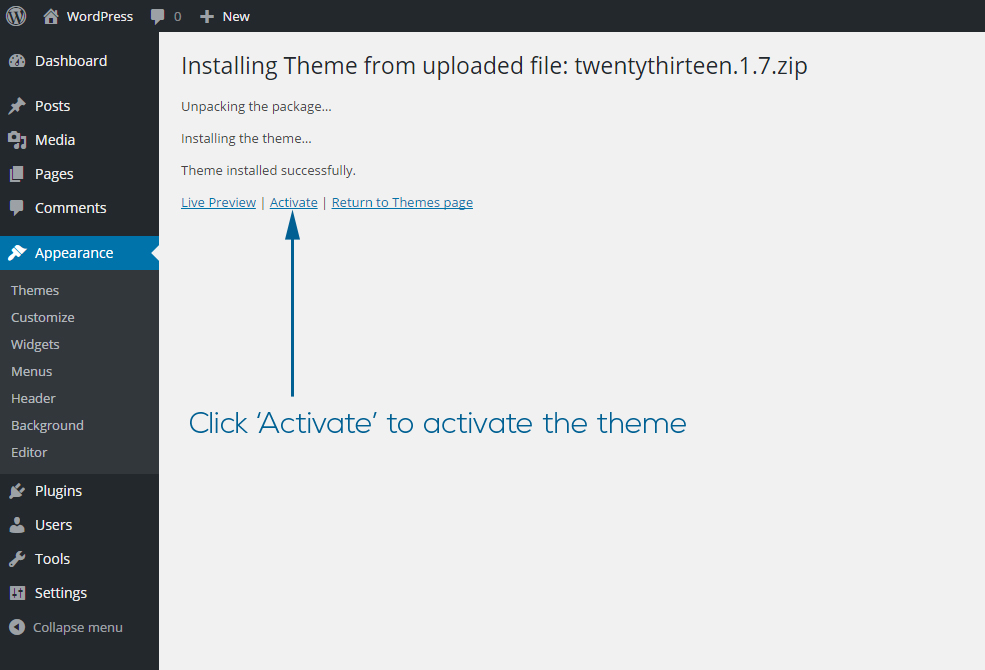
Step 3 - Once the installation of your new WordPress theme is complete, you’ll be taken to a page where you’ll see a blue ‘Activate’ link. Click that link to activate the theme you just installed:

Your theme is now active and you can view it by visiting the homepage of your website.
How to upload and install a WordPress theme via the admin panel
If you acquired a WordPress theme from a third-party or if you created a custom WordPress theme, you’ll still be able to upload it via the admin panel. Make sure you have your theme zipped before you start. Uploading and installing a WordPress a WordPress theme via the admin panel is fairly easy. Navigate to Appearance - Themes, click the top ‘Add New’ button and on the new page, click the ‘Upload Theme’ button.
Step 1 - Go to Appearance - Themes and click the ‘Add New’ button:
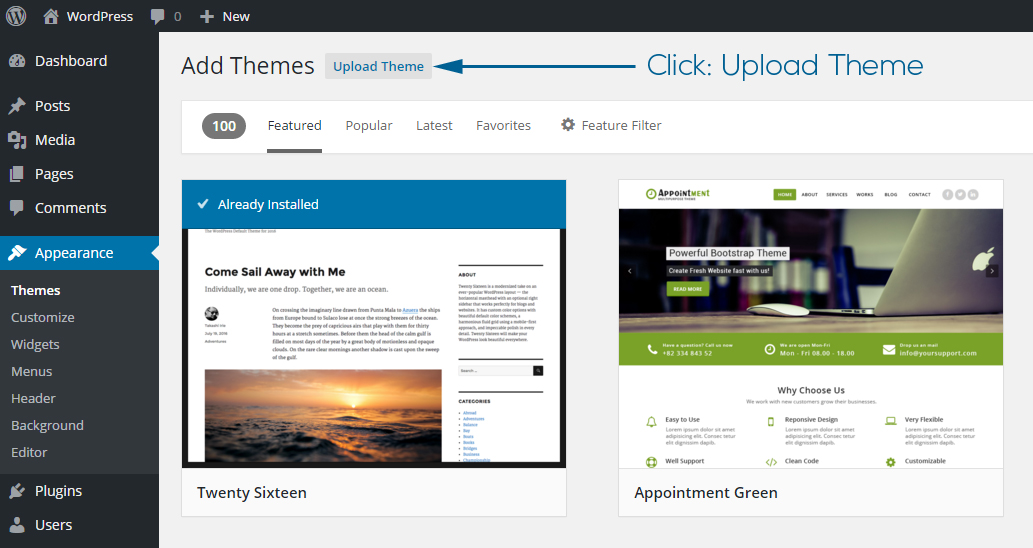
Step 2 - Click the ‘Upload Theme’ button:
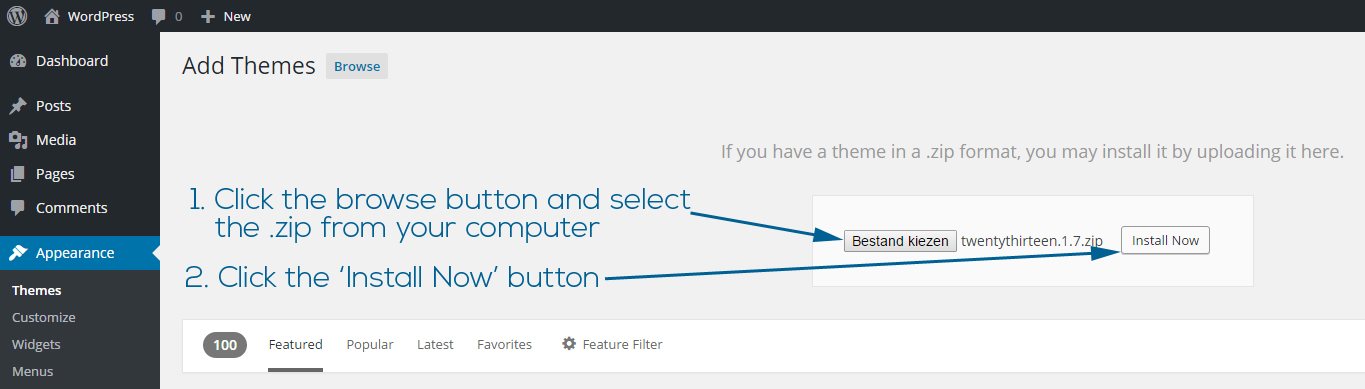
Step 3 - A small box including a browse button will appear. Click that browse button, select the zipped file from your computer and click ‘Install Now’:
Step 4 - Installing the theme will take a moment. Once completed, click the ‘Activate’ link to activate your installed WordPress theme:
You’re ready with uploading, installing and activating the WordPress theme. It only took 4 steps to upload and install a WordPress theme via the admin panel.
How to upload and install a WordPress theme via FTP
If you’ve downloaded or bought a WordPress theme somewhere from the world wide web, or created a custom WordPress theme (or hired us to create a custom WordPress theme for you ;) ), you can upload and install the WordPress theme via FTP. You’ll still need to activate the theme via the admin panel, which will be easy after uploading the theme via FTP has been completed since you’ll see the uploaded theme popup in Appearance - Themes. You’ll need a FTP client for this to be able to login to your server via FTP. We’ve been a loyal user to FlashFXP, but free alternatives as FileZilla will also do the job for you.
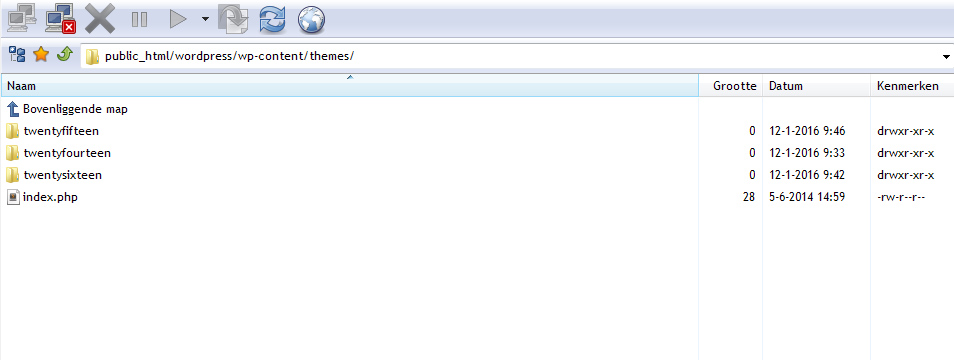
Step 1 - Login to your server via FTP and navigate to the /themes folder. If you did a clean WordPress install, it will look something like this:
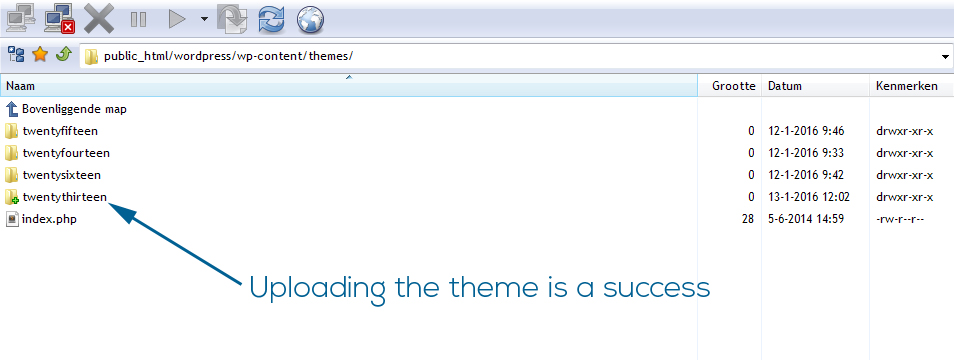
Step 2 - Unzip your theme and upload the theme folder in the /themes folder. After uploading is completed, you’ll see the uploaded theme listed between the other themes:
Step 3 - Login to the WordPress admin panel and go to Appearance - Themes. You’ll see the theme you uploaded, all you need to do is hover over it with your mouse and click the ‘Activate’ button to activate the theme:
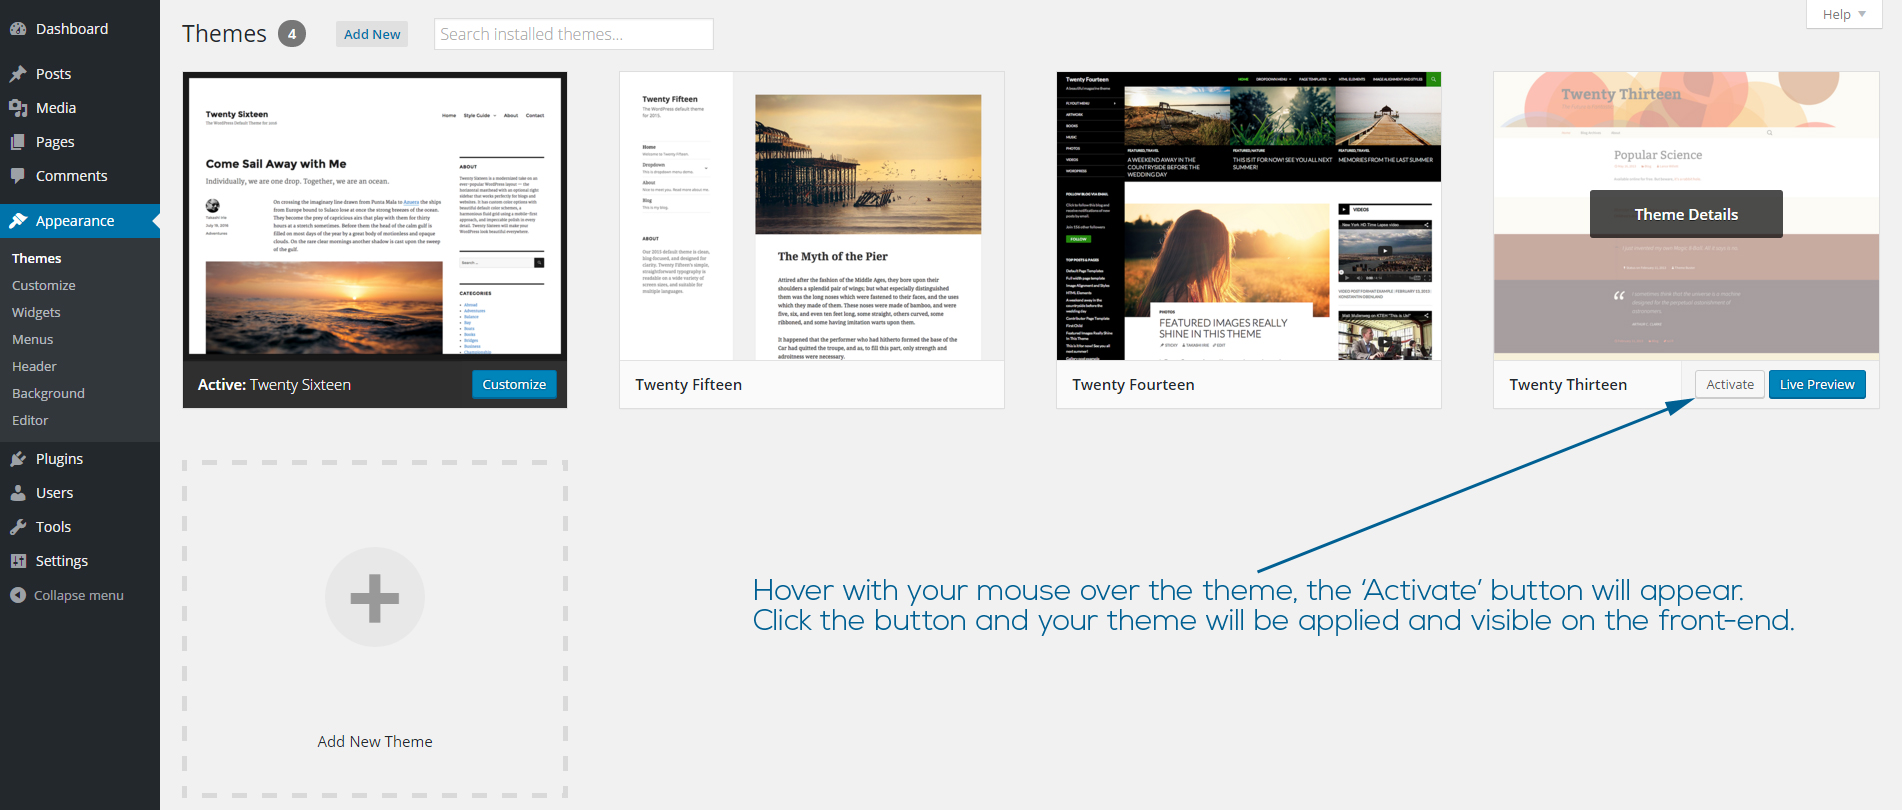
After you’ve clicked the ‘Activate’ button, the theme is applied to your website. You’ll see the theme in its full glory if you visit the homepage of your website. Only 3 steps were needed to upload and install a WordPress theme via FTP.
Was this useful?


Resource categories
Share this resource
