
How to make a custom widget in WordPress
One of the many benefits of using WordPress as the CMS for your website is that you can take the advantage of WordPress widgets. What makes WordPress widgets so great is that you can use WordPress widgets everywhere on your website, and if you navigate in the admin to the widget section and make an edit to your widget, the edit will be applied on all pages where the widget is displayed. In this tutorial, you’ll find out how to make a custom widget in WordPress by creating the widget class containing several functions. This custom widget will be a very basic one, namely a text widget that allows you to display a block on the front-end of your website including a title and a paragraph of text.
Download the free widget (and all source files/scripts):
All the below scripts are freely available. You can copy them via the given examples, but you can also download the scripts combined in nicely ordered files (including tabs/indents), by clicking the download link below:
Download Free WidgetCreate a custom widget in WordPress
Creating a custom widget in WordPress is very similar to creating a WordPress plugin. It is even easier because you only need a single base file. A WordPress widget consists of three important functionalities which need to be used during the custom widget creation. These functionalities are widget(), update() and form(). After naming the three functionalities in your widget, the widget can be uploaded to the theme folder after which the widget is called in functions.php file. The created widget can be found in the appearance - widgets menu.
Step 1 - Create a class that will extend WP_Widget class:
class PSDtoWPtext_Widget extends WP_Widget {
}
?>
Step 2 - Create a function that will extend the WP_Widget class using the constructor __construct. __construct allows us to add the arguments ID, a name and if you want (optional) a classname and a description (this will be displayed on the widgets page in the WP admin):
parent::__construct(
'psdtowpnet_widget',
__( 'PSDtoWP Text Widget', 'psdtowpnetblock' ),
array(
'classname' => 'psdtowpnet_widget',
'description' => __( 'Display a block on your website inlcuding a title and paragraph of text.', 'psdtowptextdomain' )
)
);
load_plugin_textdomain( 'psdtowpnetblock', false, basename( dirname( __FILE__ ) ) . '/languages' );
}
Step 3 - Create the widget elements that will be displayed in the WP admin:
$title = esc_attr( $instance['title'] );
$paragraph = esc_attr( $instance['paragraph'] );
?>
<p>
<label for="<?php echo $this->get_field_id('title'); ?>"><?php _e('Title:'); ?></label>
<br>
<input type="text" value="<?php echo $title; ?>" name="<?php echo $this->get_field_name('title'); ?>" id="<?php echo $this->get_field_id('title'); ?>" />
</p>
<p>
<label for="<?php echo $this->get_field_id('paragraph'); ?>"><?php _e('Text'); ?></label>
<br>
<textarea rows="10" cols="16" name="<?php echo $this->get_field_name('paragraph'); ?>" id="<?php echo $this->get_field_id('paragraph'); ?>"><?php echo $paragraph; ?></textarea>
</p>
<?php
}
Step 4 - Create the function that will display the widget on the front-end:
extract( $args );
$title = apply_filters( 'widget_title', $instance['title'] );
$paragraph = $instance['paragraph'];
echo $before_widget;
if ( $title ) {echo $before_title . $title . $after_title;}
if ( $paragraph ) {echo $before_paragraph . $paragraph . $after_paragraph;}
echo $after_widget;
}
Step 5 - Clean the form values from the widget as they are saved:
$instance = $old_instance;
$instance['title'] = strip_tags( $new_instance['title'] );
$instance['paragraph'] = strip_tags( $new_instance['paragraph'] );
return $instance;
}
Step 6 - Register the widget:
register_widget( 'PSDtoWPtext_Widget' );
});
Step 7 - Save the custom built widget as a .php file, upload it in your theme folder and include it in your functions.php file:
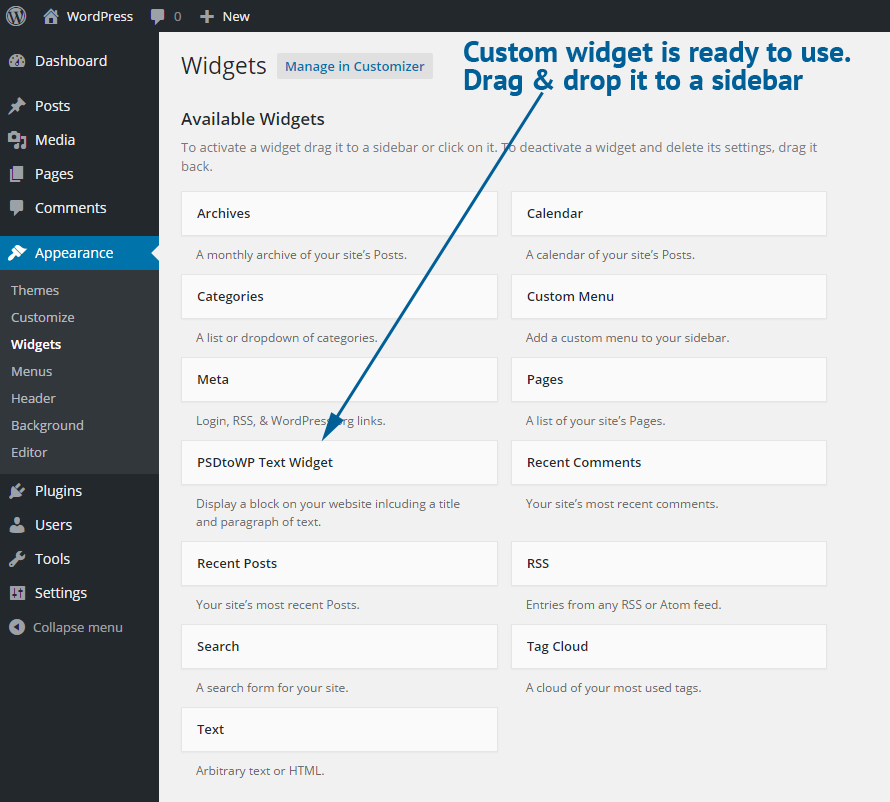
Your custom WordPress widget will be ready to use after including the widget in functions.php. Login to the admin panel and navigate to the widgets section. You’ll see the widget appear between all other available widgets. Use it by dragging it to the sidebar of your choice:
Display custom WordPress widgets on new places
We can imagine that you want a custom widget to appear on special places within your WordPress theme, and not only in the default sidebar. As a bonus, we’ll explain how you create a new WordPress sidebar and display the custom widget you just created in that sidebar, and place that sidebar on any place within your theme.
Step 8 - Register a new sidebar. Go via FTP to your theme folder, open functions.php and add the following code:
register_sidebar( array(
'name' => __( 'PSDtoWP Text Widget'),
'id' => 'sidebar-text-widget',
'description' => __( 'This basic widget will display a title and a description.'),
'before_widget' => '<section id="%1$s" class="widget %2$s">',
'after_widget' => '</section>',
'before_title' => '<h2 class="widget-title">',
'after_title' => '</h2>',
'before_paragraph' => '<p>',
'after_paragraph' => '</p>'
) );
}
add_action( 'widgets_init', 'custom_widgets_init' );
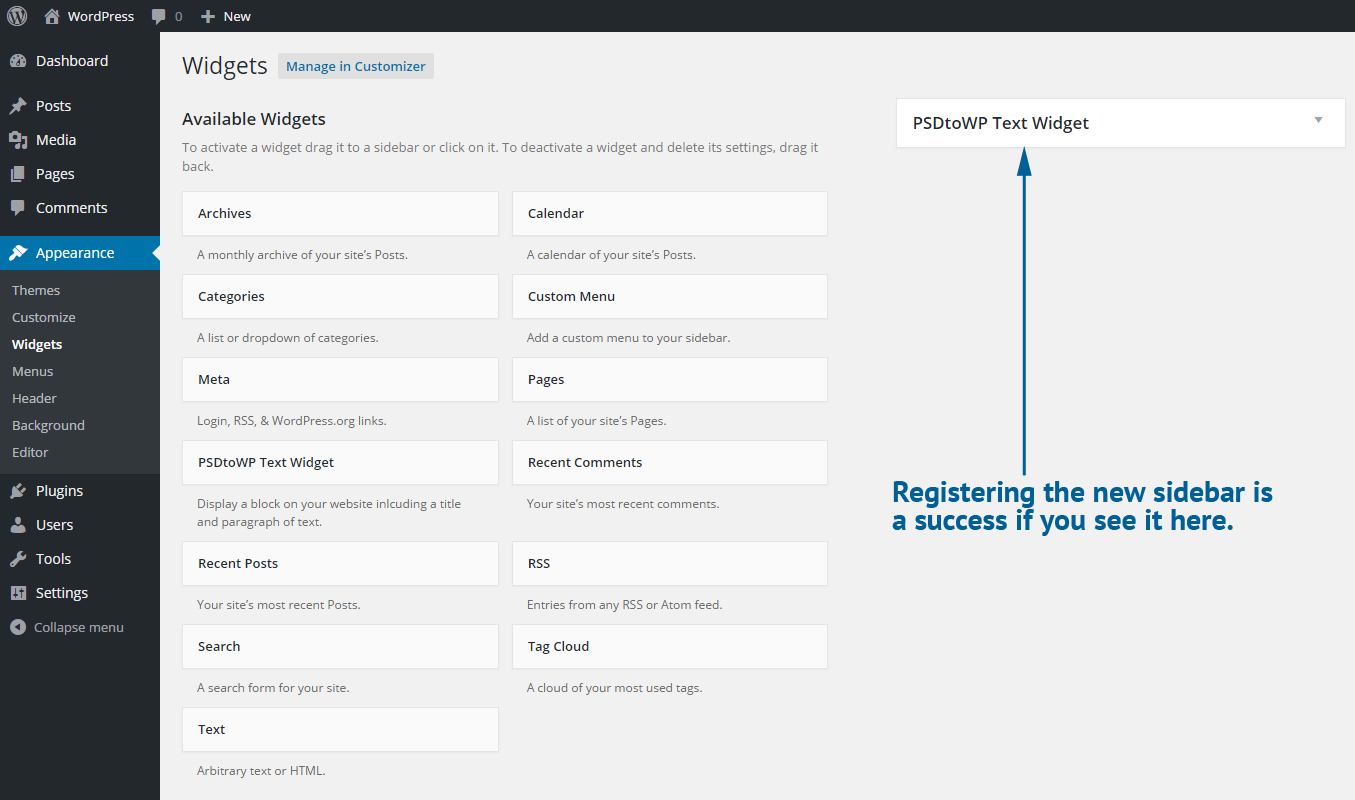
This will result in a new sidebar that will appear in the widgets section in the WordPress admin panel:
Step 9 - Let the sidebar show up on the front-end by calling it in your template file:
<?php dynamic_sidebar( 'sidebar-text-widget' ); ?>
<?php endif; ?>

Step 10 - Drag & drop your custom created widget to the custom created sidebar:
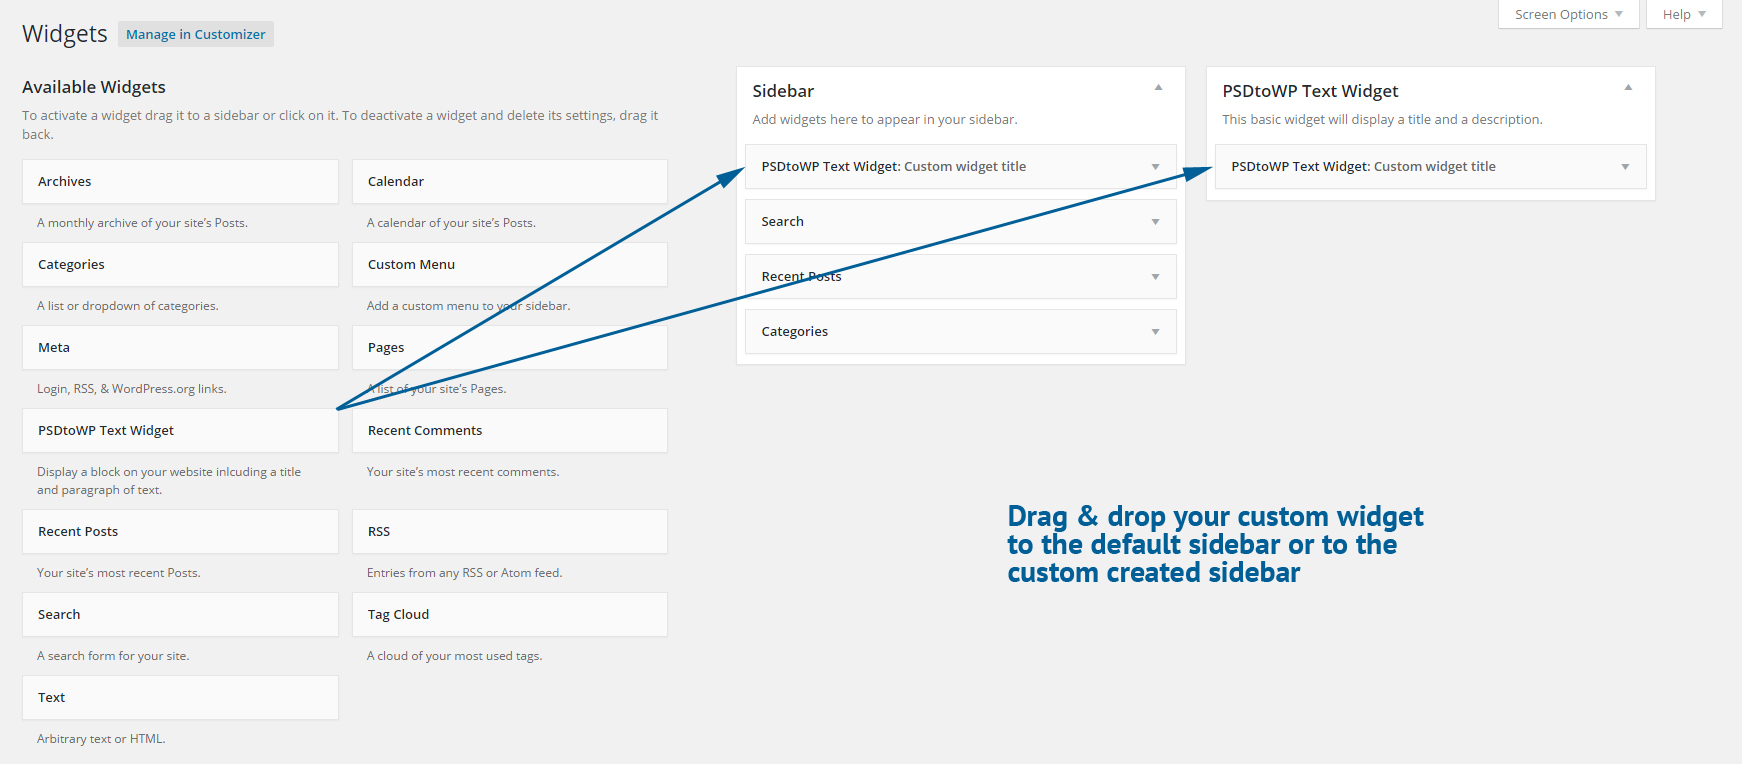
You’re all set now. The below screenshot is the result of placing our custom built WordPress widget in both the default sidebar as in the custom built sidebar.

Download the free widget (and all source files/scripts):
All the above scripts are freely available. You can copy them via the given examples, but you can also download the scripts combined in nicely ordered files (including tabs/indents), by clicking the download link below:
Download Free WidgetWas this useful?


Resource categories
Share this resource
