How to make a sidebar widget in WordPress
WordPress widgets are a great way to easily add a specific functionality to sidebars or other sections of your WordPress website. If you’re developing a custom theme, then you’ll first need to enable the use of widgets. This tutorial on how to make a sidebar widget in WordPress will show you exactly how to make your first WordPress sidebar widget. In this tutorial we’re assuming you’re building your WordPress theme from scratch, which means we need to register the sidebar widget first, before we can use it.
Create a WordPress sidebar widget
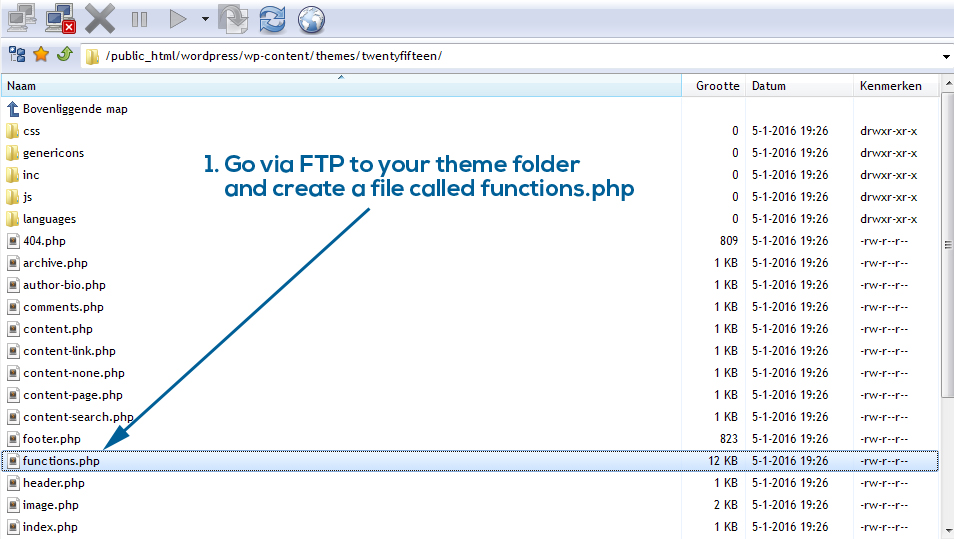
Step 1 - Create a file called functions.php in your theme’s folder:

Step 2 - Create a function in functions.php that registers the sidebar widget, and register that function (for this example, we’ve named the widget ‘Blog Right Sidebar’:
register_sidebar( array(
'name' => 'Blog right sidebar',
'id' => 'blog_right_sidebar',
) );
}
add_action( 'widgets_init', 'arphabet_widgets_init' );

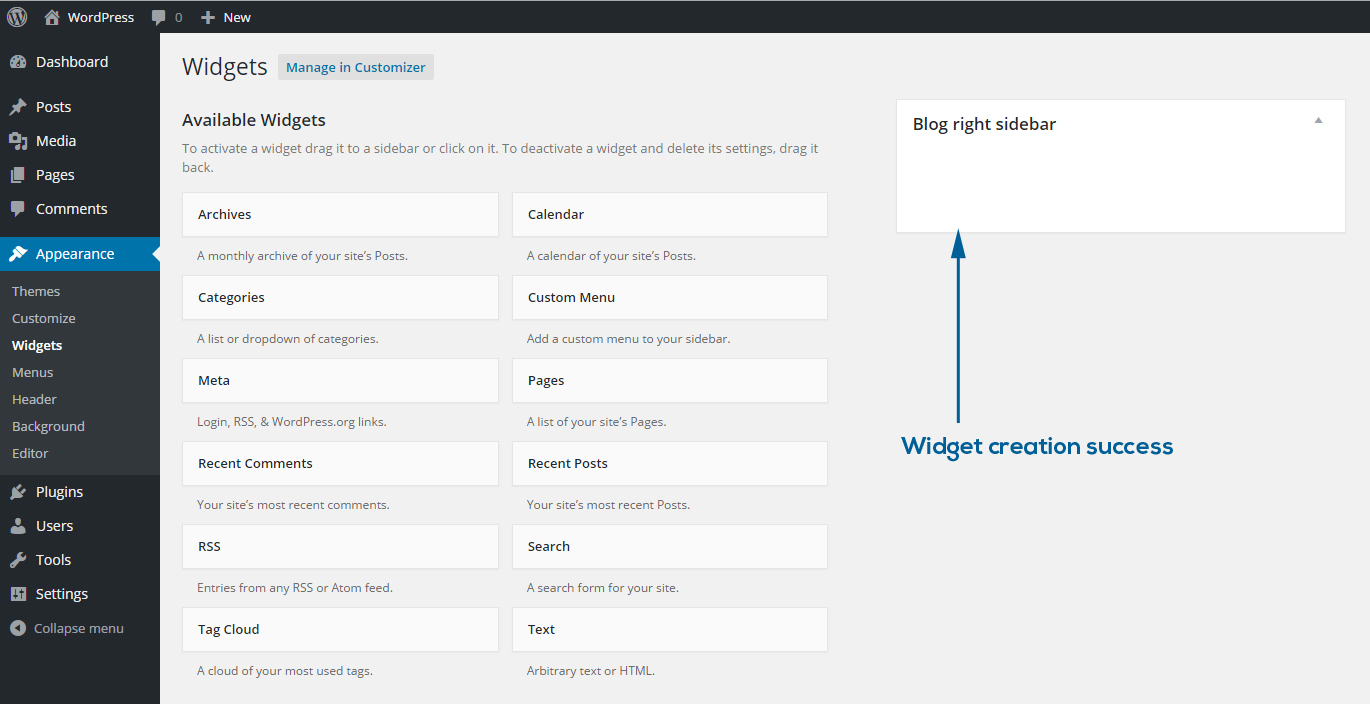
Step 3 - Login to the WordPress admin panel and navigate to Appearance - Widgets and check if the widget creation was a success. It should look alike:

Step 4 - Now that you’ve successfully made a sidebar widget, it’s time to use it. First call the sidebar widget in your template file (usually sidebar.php):
<div class="sidebar">
<ul class="sidebar-list">
<?php dynamic_sidebar( 'blog_right_sidebar' ); ?>
</ul>
</div>
<?php endif; ?>

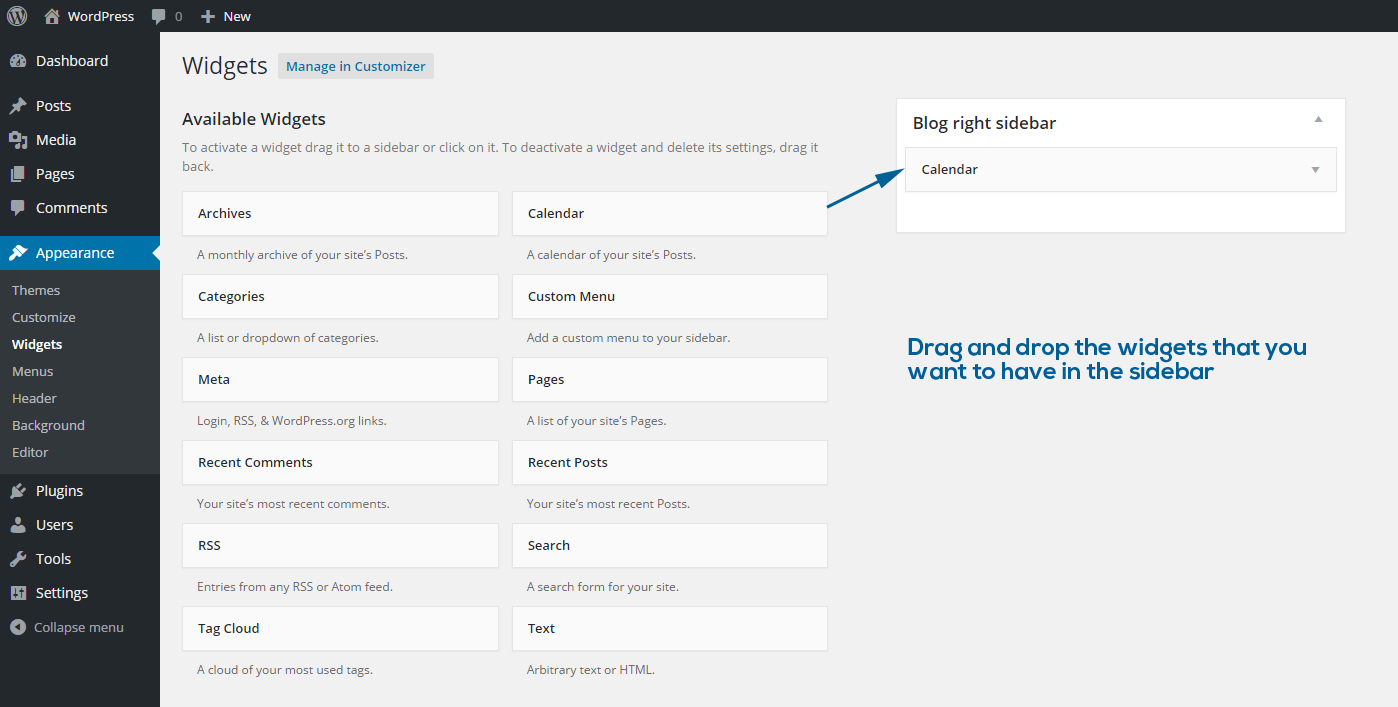
Step 5 - The sidebar widget is ready to use but as you have seen in step 3, the sidebar is empty. Let’s add the calendar widget:

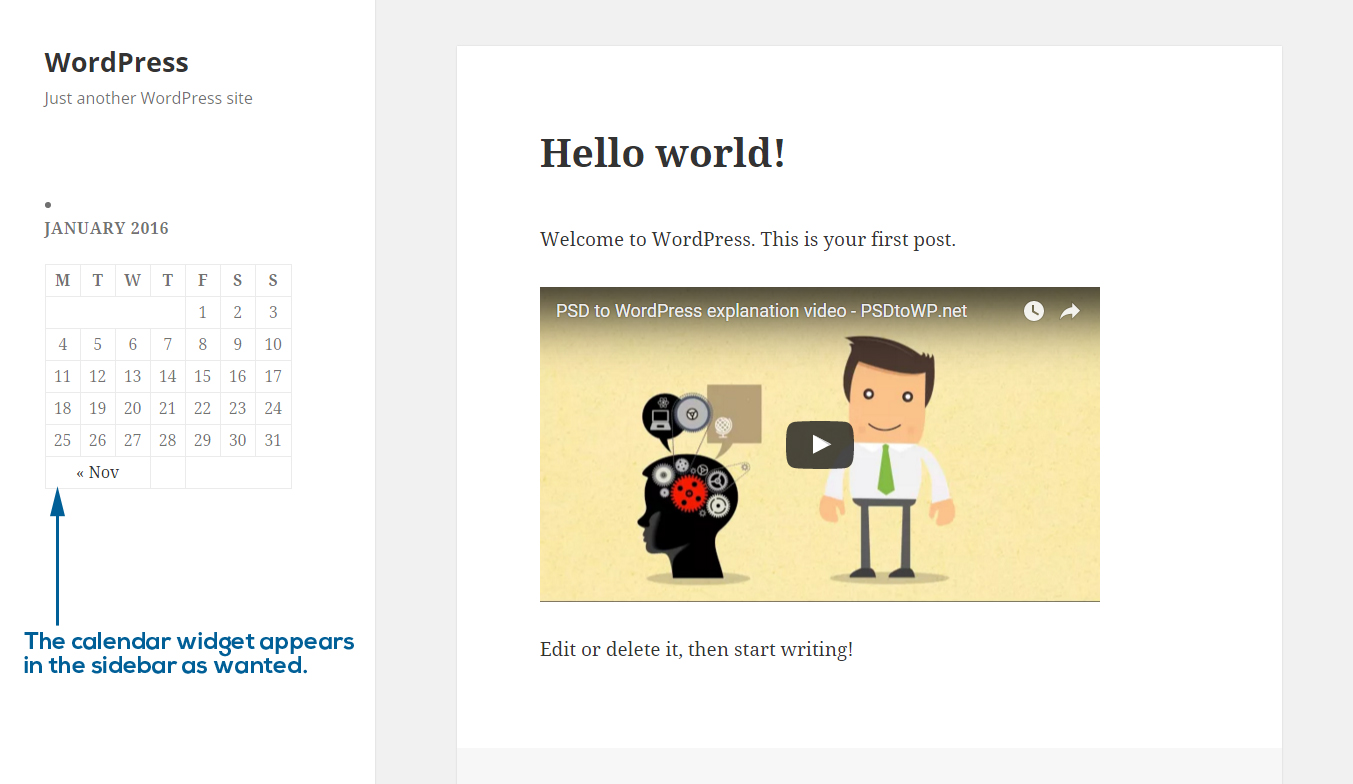
Step 6 - Once you’ve saved the widget, you can navigate to the front-end of your website and go to a page where the sidebar is displayed. You’ll now see the widget you created:


