
How to add a video in WordPress posts or pages
Whether you have an easy topic that you want to cover, or an advanced topic, videos are a great way of explaining something. Before we explain how to add a video in WordPress, it’s important to understand the difference between uploading a video to your WordPress site, or embedding a video from a third-party video service like YouTube or Vimeo.
Uploading a video requires you to upload the video to your server and (we’ll explain later how to do that) and display that video using HTML. Embedding a video means that you upload your video to a video third-party video service and display that video on your WordPress pages or posts using HTML. Watching a video causes a heavy load on a server so when your WordPress website is hosted on a shared hosting account, uploading a video to your server will cause your server to crash when your websites gets lots of traffic. Thereby, you’ll also miss out on potential traffic that a third-party video service can generates. Uploading a video to a third-party website and embedding it on your WordPress blog, won’t cause your server to crash with a lot of traffic since its hosted on the third-party website.
Embedding a video is for most people the best option, so well go into that first.
How to embed a video from a third-party in WordPress?
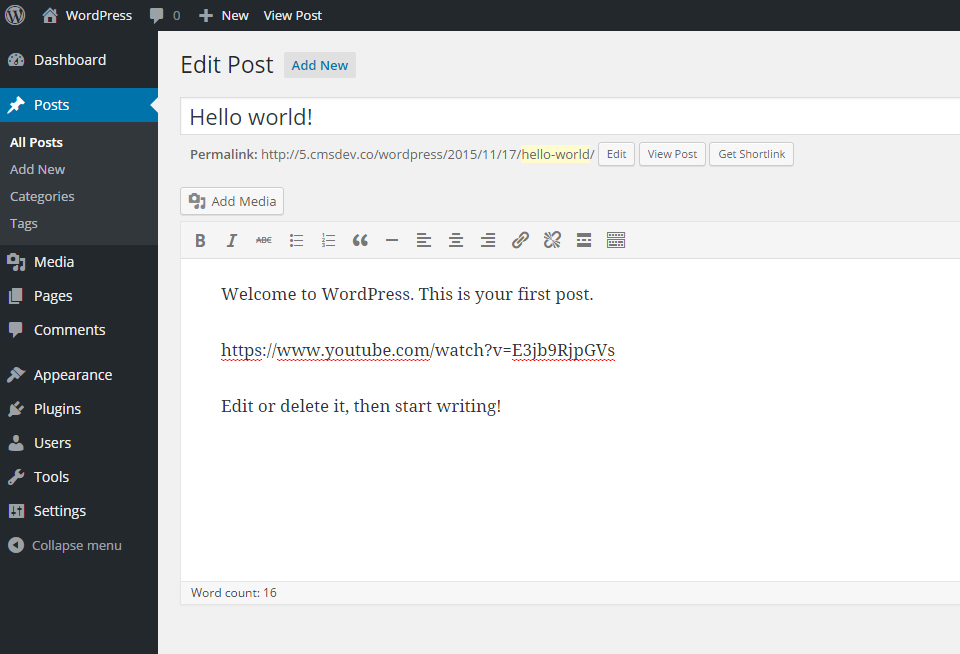
Embedding a video in your WordPress posts or pages is actually quite simple if you make sure you upload the video to one of the by WordPress internal whitelisted services. Simply go to the video of your choice and copy its URL. Then login to the WordPress admin panel and go to the post or page in which you want to embed the video. Paste the URL on a new line and make sure it isn’t hyperlinked (don’t make it a link, just paste the URL as text). As soon as you paste the URL, it will automatically transform into the embedded video.
Paste the URL in the WordPress visual editor:
The URL will automatically transform into the embedded video:
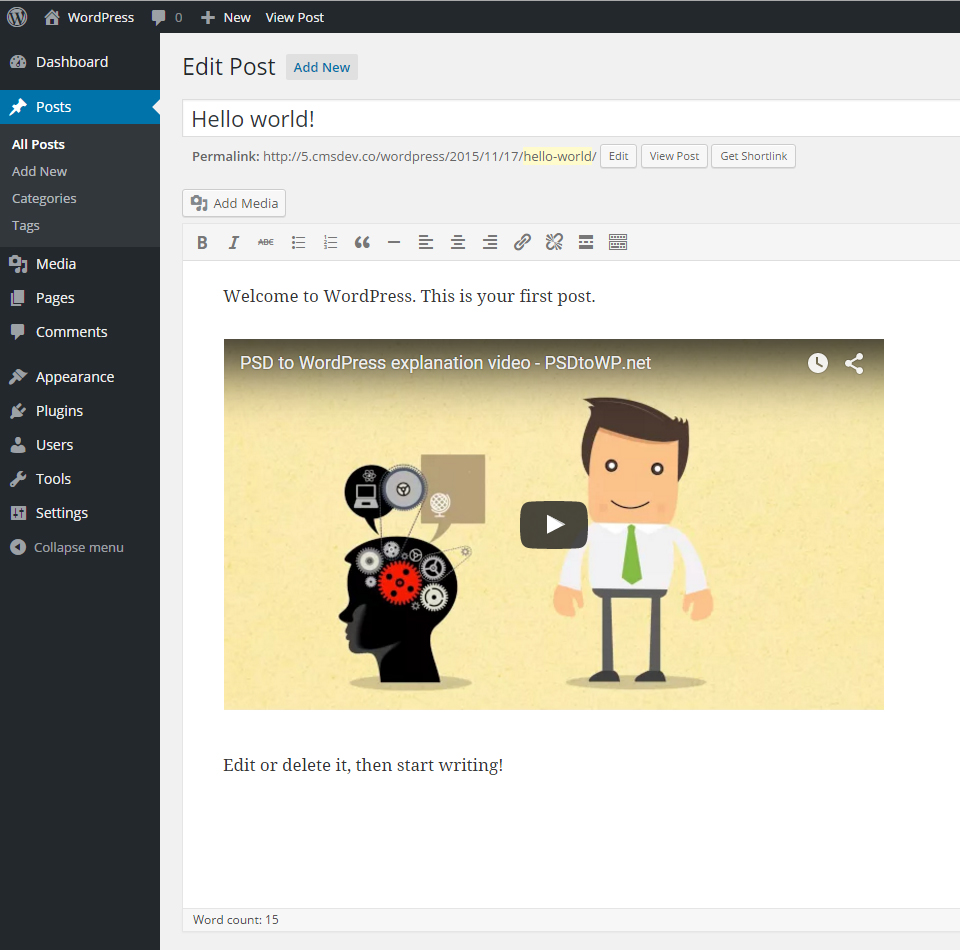
Now simply save the post or page and you video will display accordingly.
A second way is by using the [embed] shortcode. Again copy the URL of the video that you want to embed and place it within the [embed]URL[/embed] shortcode, on the position that you want the video to display.
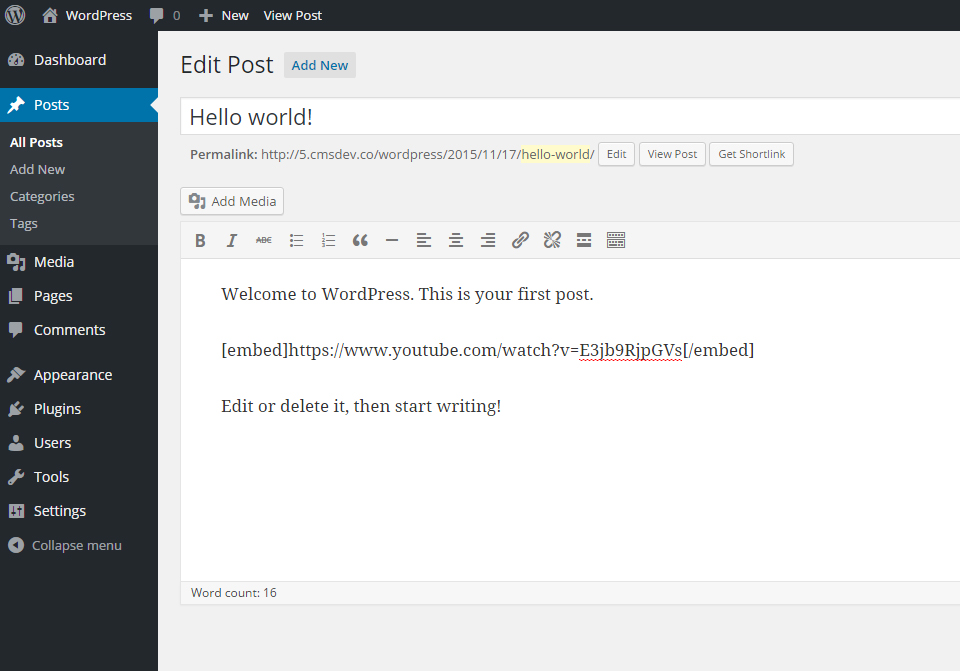
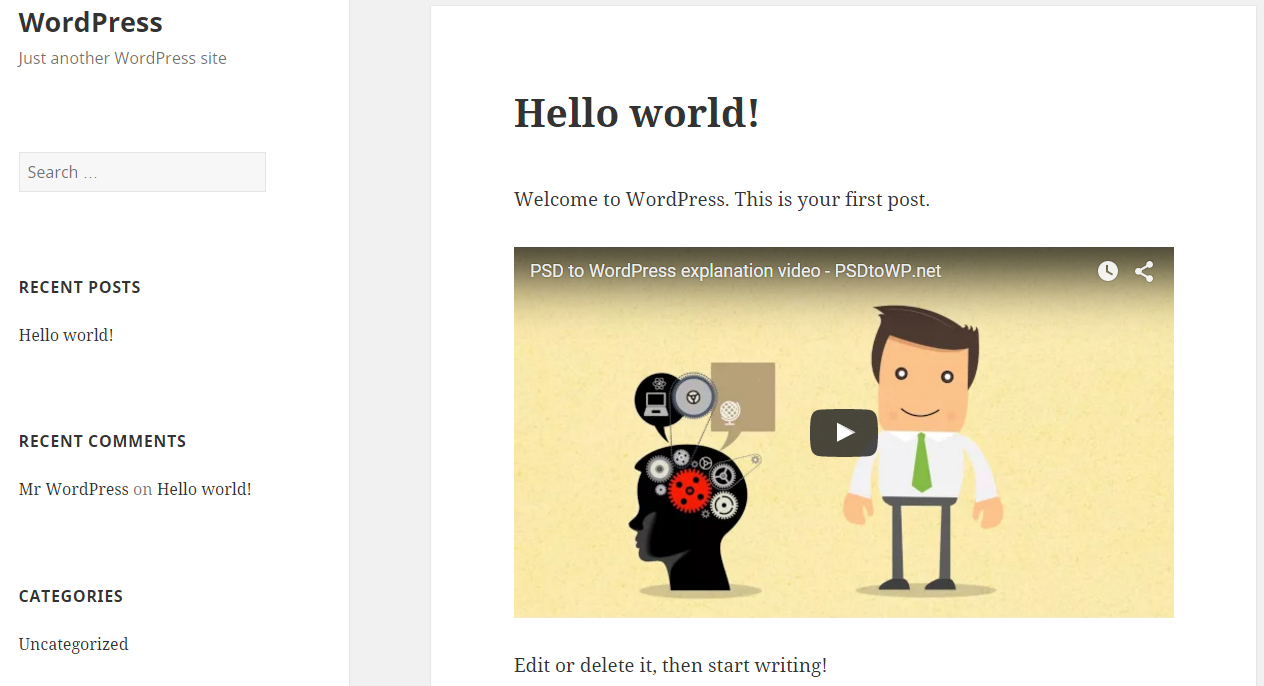
Save the post or page, and your video will display accordingly:
What if using an URL doesn’t work?
If you use a video from a non-whitelisted service, or if WordPress somehow does not succeed in converting the URL into an embedded code, it will display the URL as text or as a hyperlink. When this happens, you’ll need to copy the embed code from the video site, click the ‘text’ tab and paste the embedded code directly in your post or page, like shown in the screenshots below.
First, copy the embedded code from the third-party video site:

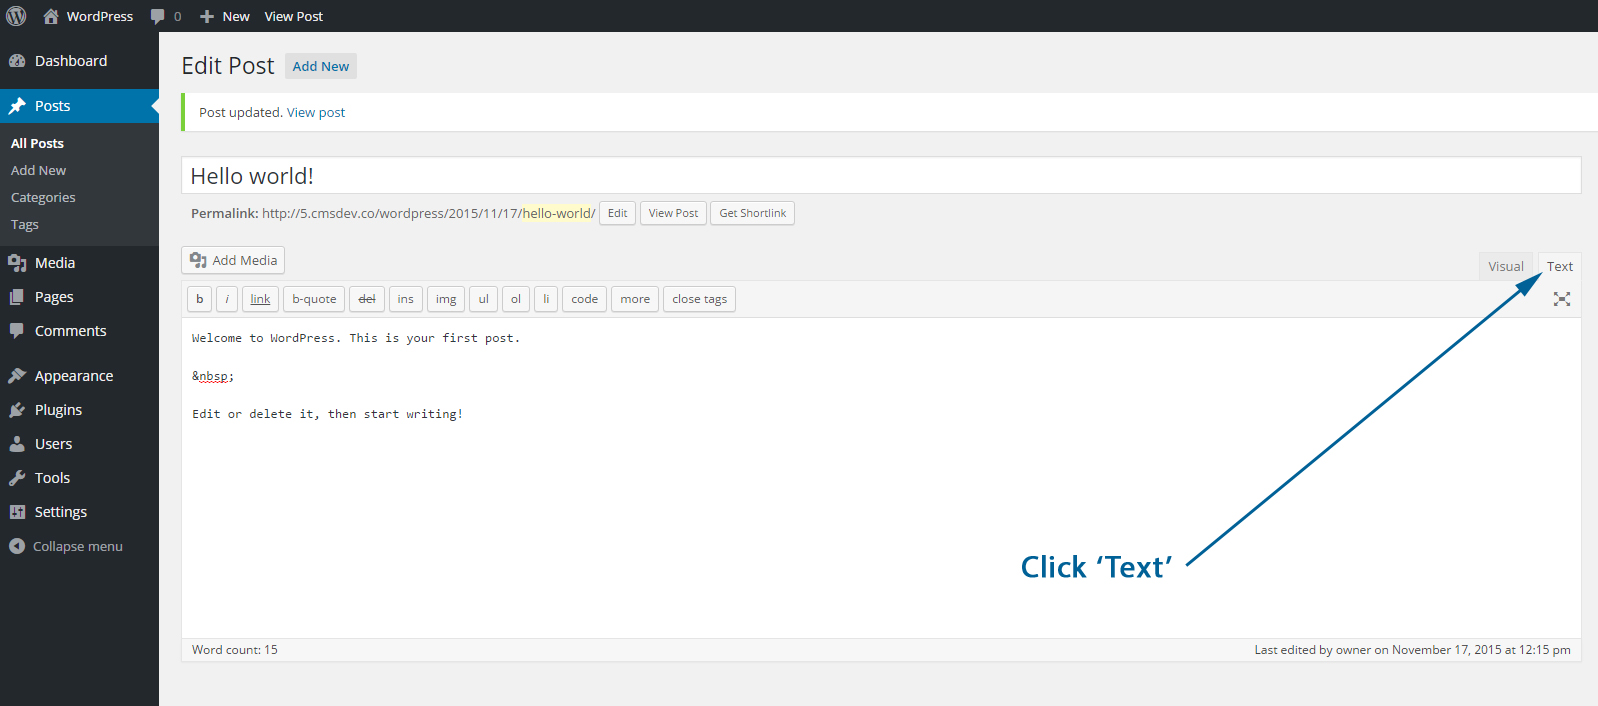
Second, login to the admin panel, go to the post or page and switch from ‘Visual’ to ‘Text’:
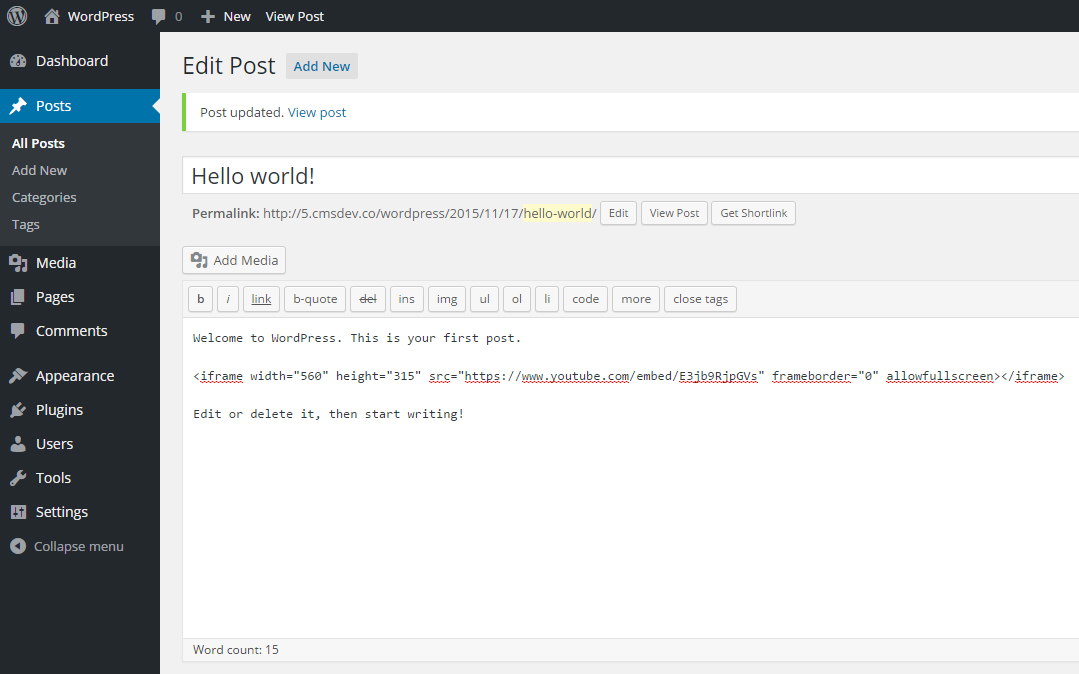
Third, paste the embedded code you copied from the third-party video site and hit the blue ‘Publish’ or ‘Update’ button:
Now your video will display accordingly.
How to upload a video to your WordPress site?
If uploading a video to a third-party service isn’t an option for you, then you can always upload a video to your server and display it on your website. Bear in mind that your server should have enough resources to handle the resources needed when traffic increases. To make sure that your video works in all browsers, you have to make sure you convert your video to .mp4, .webm and .ogv (and upload all 3 versions). Luckily there are great (and free) video converters for this online, for example the video converter from Miro.
There are two ways on how to upload a video to your WordPress website. The easiest way is to upload it via the ‘Add Media’ button, which you find in all posts/pages, or in the left menu via the ‘Media’ menu item. A big disadvantage of this method is that you’re limited to a maximum upload file size of 8MB (most video’s will exceed 8MB). After you’ve uploaded your video via the media function, you’ll see a direct link to the video on the right side of your screen. Test it by copying the URL and pasting it in your browser.
The second way is by uploading the video via FTP, right onto your server. What you first need to do is get your FTP logins and a FTP client. View a detailed explanation on how to get the FTP logins and a FTP client in step 2 on this page. Once you’re logged into your server via FTP, you navigate to the folder in which you want to upload your video. Upload the video and get the direct URL to that video file. Test it by copying the URL and pasting it in your browser.
Remember that in both ways, you need to make sure that you upload the .mp4, the .webm and the .ogv formats (so three video’s total so that your video will be cross-browser viewable.
How to display a video you just uploaded via the media function or via FTP?
Now that you have uploaded the video to your server via the WordPress admin or via FTP and have the direct URL’s to the 3 different versions of the video ready, it’s time to display that video in a post or on a page. For this, you’ll need a bit of HTML5:
<source src="http://yoursite.com/link/to/video.mp4" type="video/mp4" />
<source src="http://yoursite.com/link/to/video.webm" type="video/webm" />
<source src="http://yoursite.com/link/to/video.ogv" type="video/ogg" />
</video>
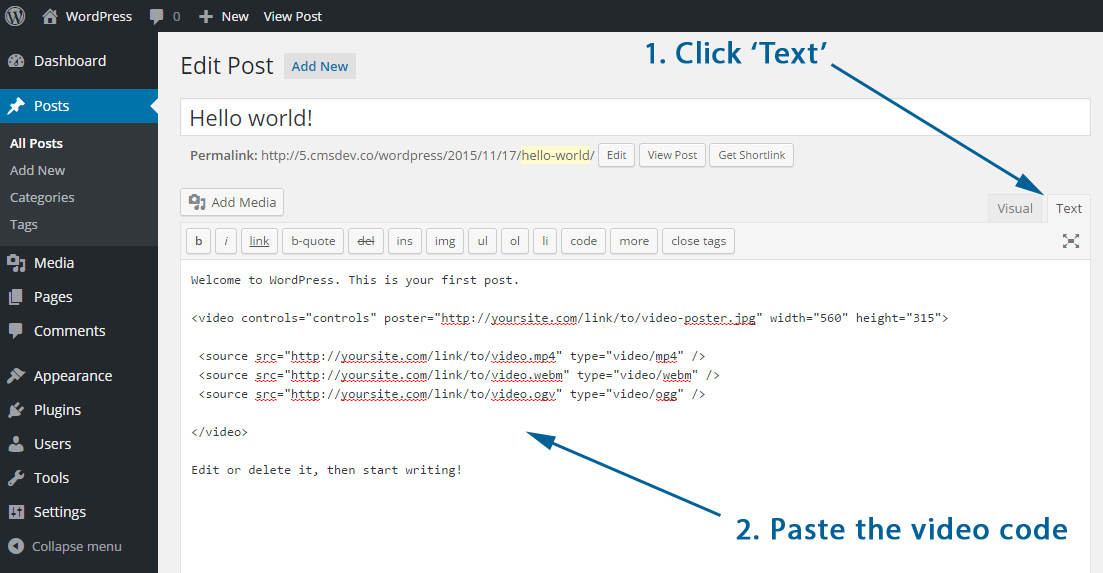
Now that you have your code to display the video ready, it’s time to place it on the page or post of your desire. Go in the admin panel to the page or post, click ‘Text’, paste the video code and hit the blue ‘Publish’ or ‘Save’ button:
Now that you’ve saved the page or post, your video will be displayed on the page or post and visitors are able to view it directly on your WordPress website.
Was this useful?


Resource categories
Share this resource
