
How to install a WordPress plugin
One of the many benefits that WordPress offers is the enormous availability of plugins. This allows you to add new functionalities to your WordPress website, without having to spend lots of money or time in the development of the functionality you need. There are two ways on how you can install a WordPress plugin. The first way is by installing the plugin via the WordPress admin, and the second way is by uploading the plugin to your server, which can be done via the admin panel or via FTP.
Installing a WordPress plugin using Wordpress’s admin panel
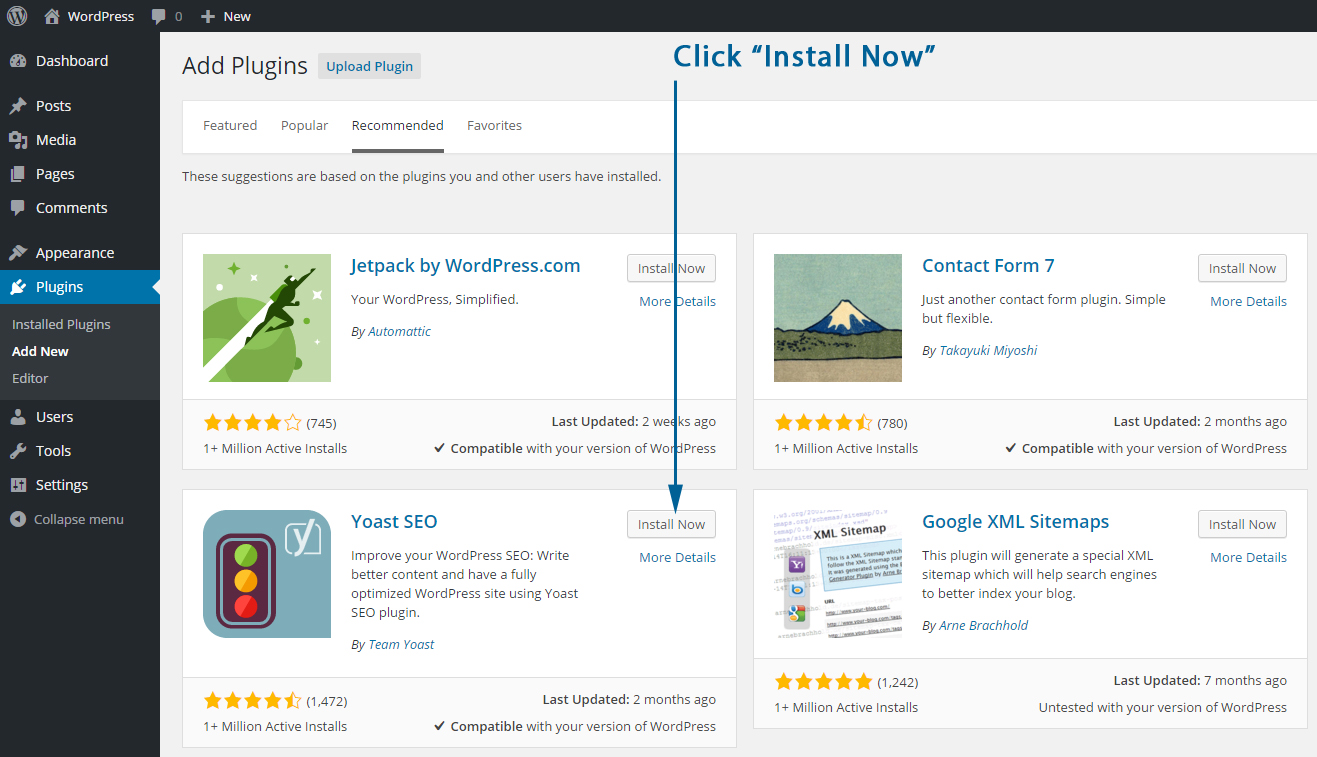
Installing a WordPress plugin via the WordPress admin panel will only take a few clicks. First click in the left menu on plugins and choose the option ‘Add New’. You now can choose between featured, popular, recommended or favorite plugins, but you can also use the search field to search through all available plugins. Once you’ve found the plugin that offers your required functionality, click the ‘Install Now’ button next to it and the plugin will install itself. Once the plugin has been installed, you’ll see the message “Successfully installed the plugin”. All you have to do now is click the ‘Activate Plugin’ link and the plugin is ready to use. Below you’ll find some screenshots in which we install the Yoast SEO plugin.
Step 1 - Search for the plugin that you want to install and click ‘Install Now’:
Step 2 - Click the ‘Activate Plugin’ link and you’re ready to use the plugin:
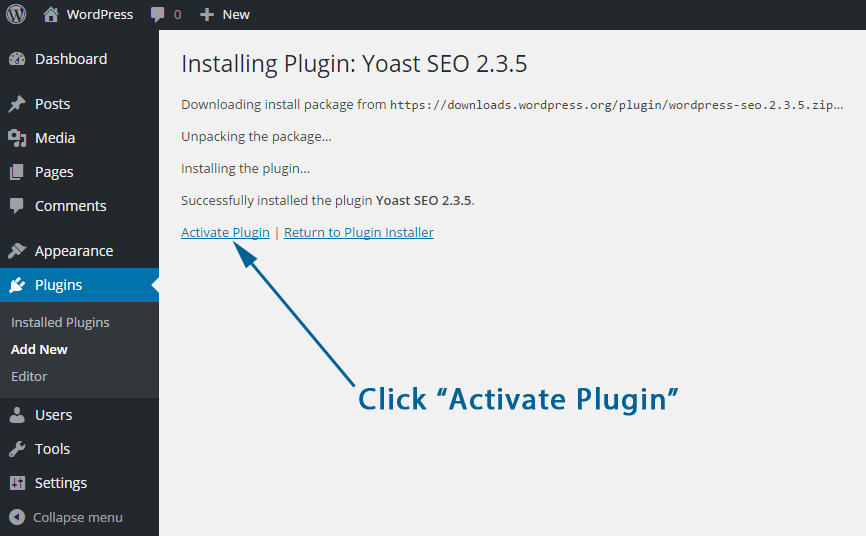
Now you’ve successfully installed a WordPress plugin.
How to upload a WordPress plugin
Sometimes the plugin search lets you down or some other reason might counteract you from finding the desired plugin via the WordPress admin panel. If that happens, you’re still be able to install the plugin that you need. Wat you need to do now is download the plugin from the plugin website and upload the plugin via the admin panel or via ftp. We’ll first explain how to upload a WordPress plugin via the admin panel and after that how to upload a WordPress plugin via FTP.
How to upload a WordPress plugin via the WordPress admin panel
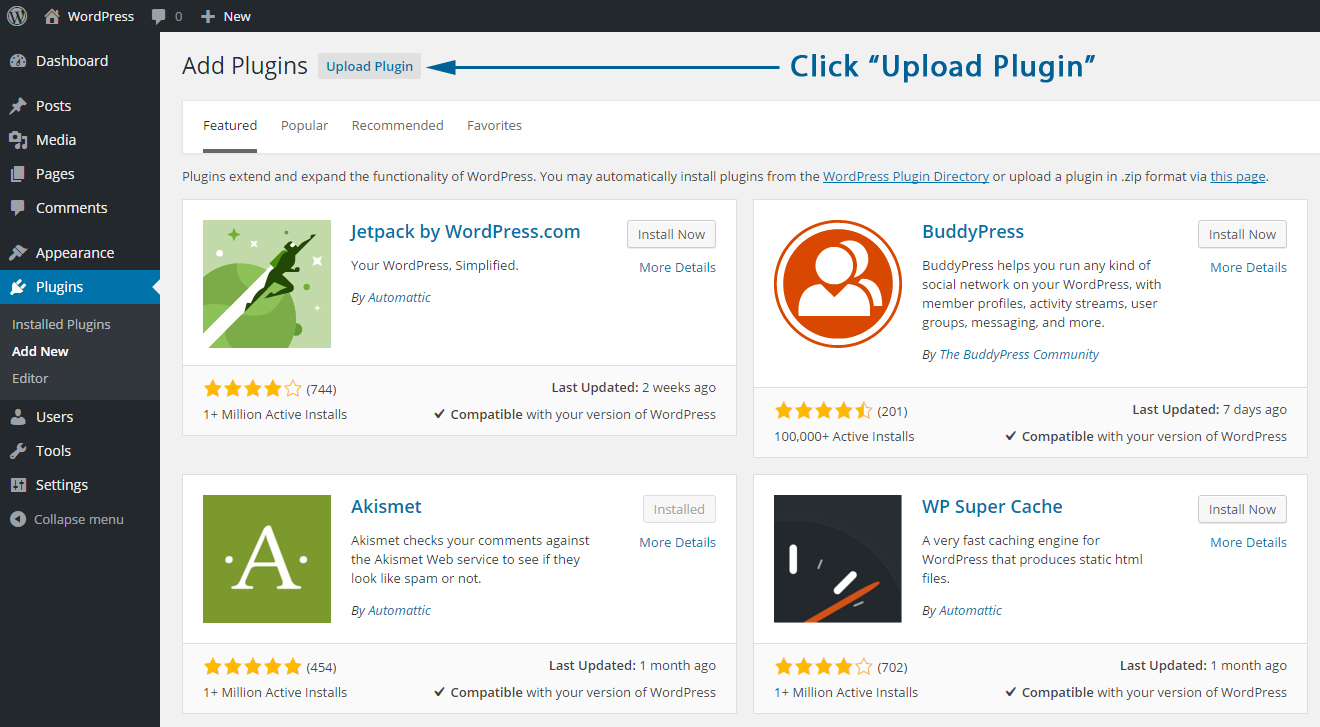
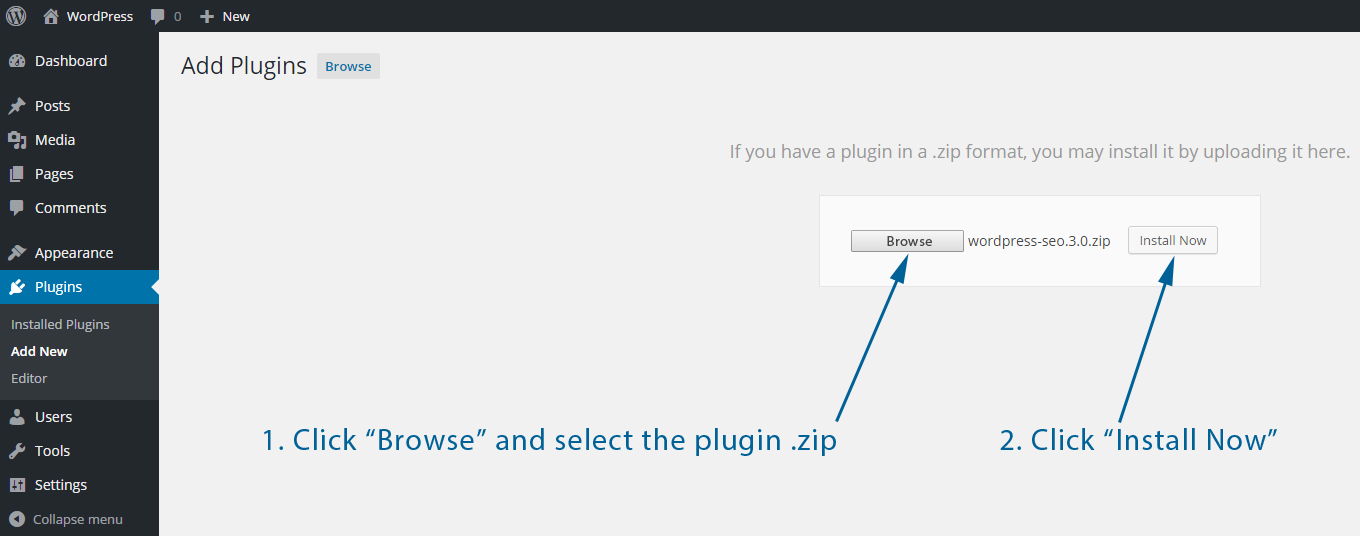
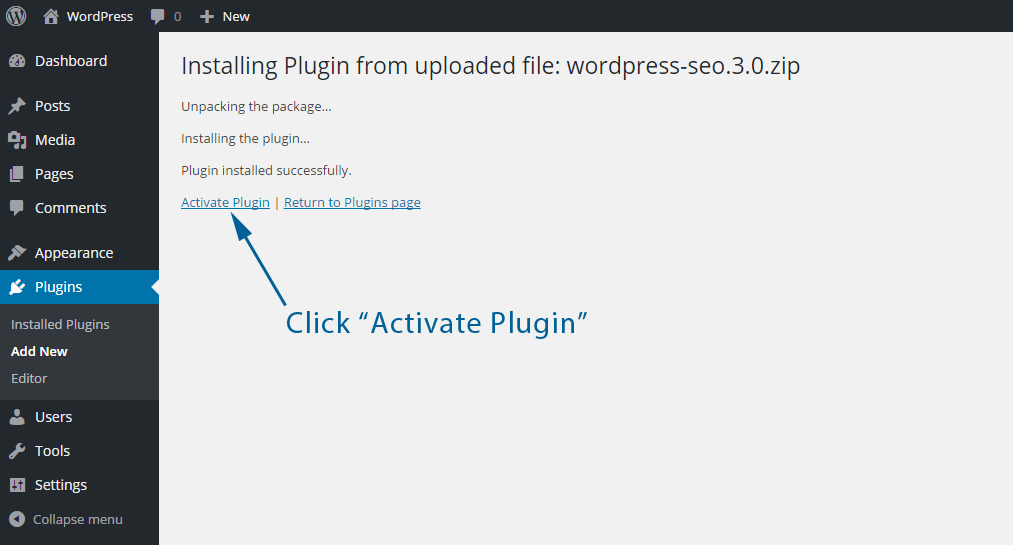
After you’ve downloaded the plugin that you need from the plugin site, or from WordPress.org, you’ll have a .zip file containing the plugin files. Don’t unzip this .zip file, because you’ll need to upload this .zip file directly in the WordPress admin. When you’re logged into the WP admin, click in the left menu on ‘Plugins’, and click ‘Add New’. At the top of the screen, you’ll see a ‘Upload Plugin’ link. Click that link and use the browse field to select the .zip file. Click the ‘Install Now’ button and the plugin will take a moment to install. Once installed, you’ll be redirected to a page where you need to activate the plugin by clicking ‘Activate Plugin’. The plugin is now active, and you can start using it.
Step 1 - Go to the admin panel, click ‘Plugins’ in the left menu and click the ‘Upload Plugin’ button:
Step 2 - Browse the plugin .zip on your computer. Upload/install the plugin by clicking ‘Install Now’:
Step 3 - Activate the installed plugin and you’re ready to use it:
You now successfully uploaded and installed the WordPress plugin via the WordPress admin.
How to upload a WordPress plugin via FTP on your server
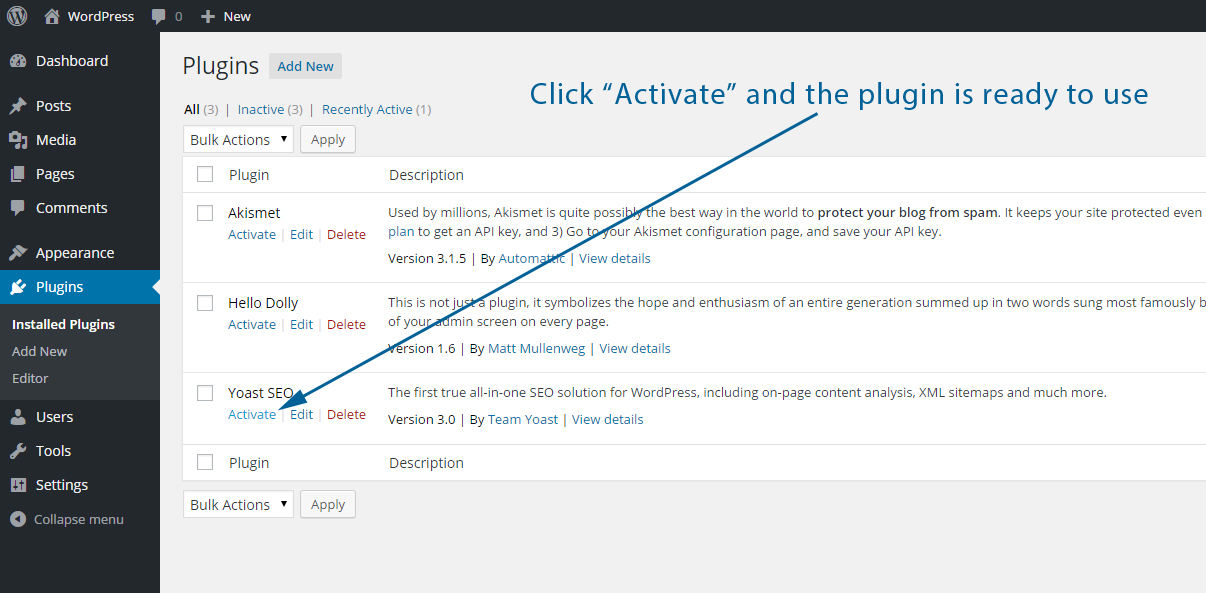
If you’re facing problems with installing a WordPress plugin via the WP admin panel, you can always upload it on your server via FTP. To be able to upload a WordPress plugin via FTP, you’ll need the FTP logins and a FTP client (view step 2 on how to get both FTP logins and a FTP client). Once you’ve downloaded the plugin and you’re logged into your server via FTP, you need to navigate to the plugins folder. You can find this folder by navigating to /wp-content/plugins/. You’ll now see the currently installed plugins. Now it’s time to upload your plugin. In contrary to the previous step, you’ll have to unzip the plugin so you’ll get a folder which includes the plugin files (instead of a zipped file). Upload that entire unzipped folder to the /plugins/ directory and after the upload is completed, login to the WordPress admin panel and click ‘Plugins’ in the left menu. You’ll now see an overview of all available plugins. If uploading the plugin went well, you’ll also see the uploaded plugin in the plugin list. Click the associated ‘Activate’ link and you are now able to use the plugin.
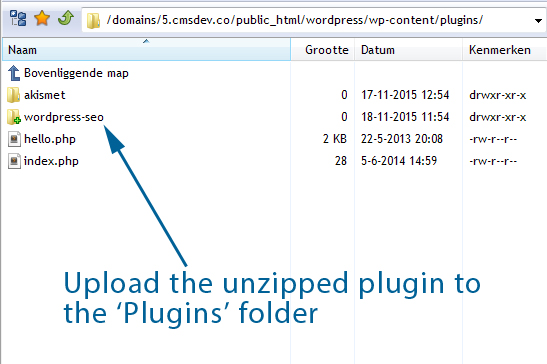
Step 1 - Unzip the plugin:

Step 2 - Navigate to the /plugin/ directory via FTP and upload the unzipped plugin folder:
Step 3 - Navigate to the plugins section in the WP admin and activate the plugin:
You now successfully uploaded a WordPress plugin via FTP and activated it via the WP admin.
Was this useful?


Resource categories
Share this resource
