How to upload a WordPress plugin
WordPress currently has just over 42K plugins available in its plugin directory. Plugins are a great way to add functionalities to your WordPress websites, without having to reinvent the wheel. Before going into explaining how to upload a WordPress plugin, it’s good to understand that installing a WordPress plugin is the next step after you’ve uploaded a plugin. After you’ve finished uploading your WordPress plugin using this tutorial, we recommend to follow our WordPress plugin installation tutorial (which also has a section in which we explain how to upload a WordPress plugin)to get your plugin to work.
WordPress offers two methods on how you can upload a WordPress plugin. The first method is by choosing for ‘Upload Plugin’ in the admin panel. The second method is by uploading the plugin via FTP onto your server. Let’s start with the easiest method, uploading a WordPress plugin via the Admin panel.
Use the WordPress admin panel to upload a WordPress plugin
Uploading a WordPress plugin via the admin panel only takes a few steps and doesn’t involve any technical knowledge. You need to make sure that you’ve downloaded the WordPress plugin that you want to install before you can start.
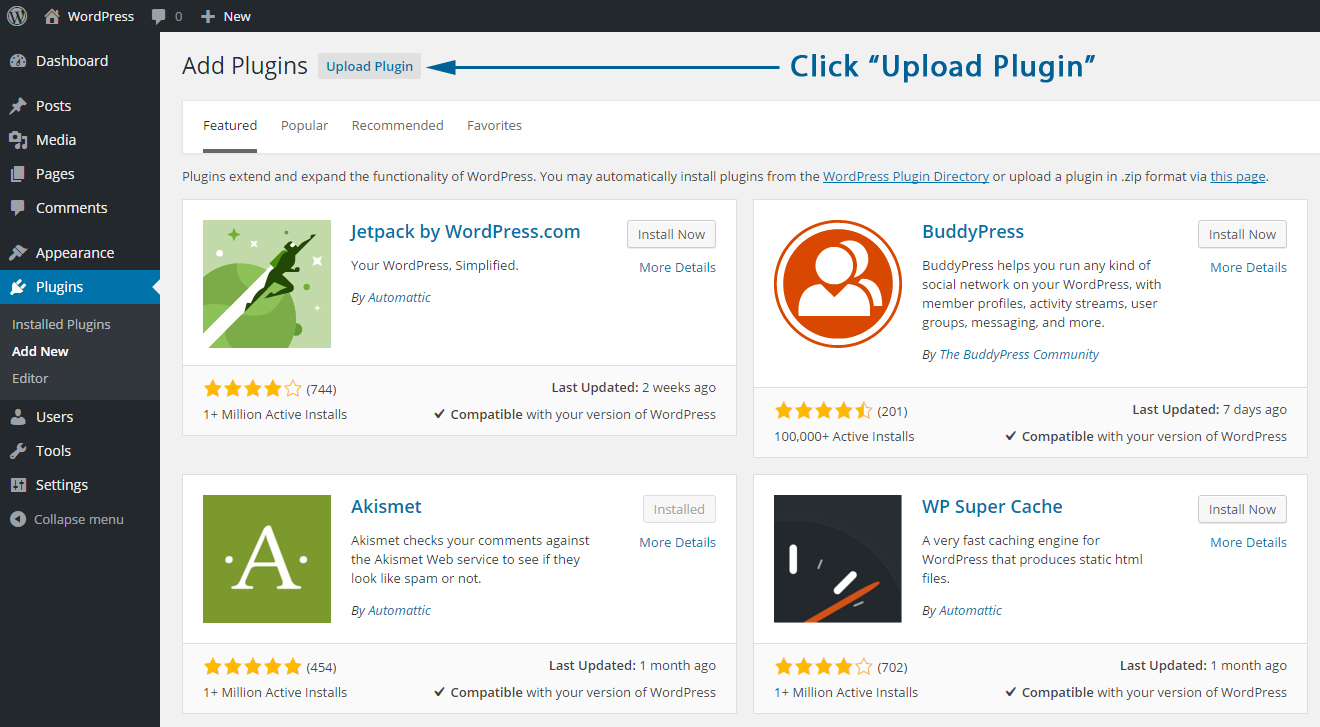
Step 1 - Login to the admin panel and navigate via the left menu to plugins, and click on the top ‘Upload Plugin’ button:
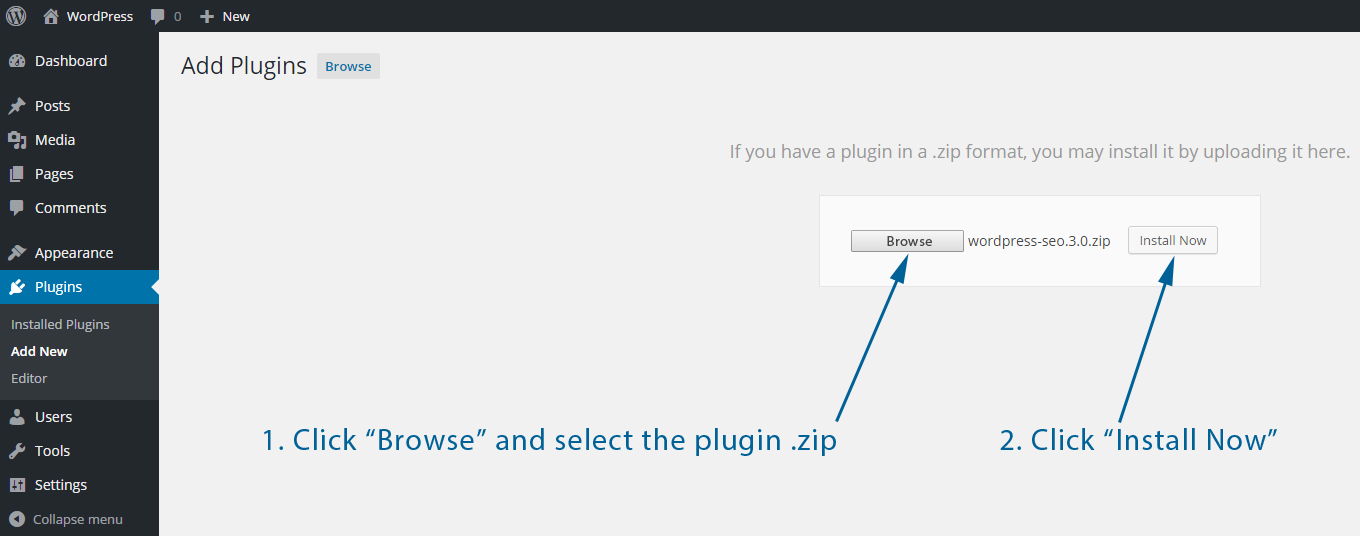
Step 2 - Click the ‘Browse’ button, select the zipped plugin and click the ‘Install Now’ button:
Step 3 - Wait until WordPress finishes the installation and activate the plugin by clicking ‘Activate Plugin’:
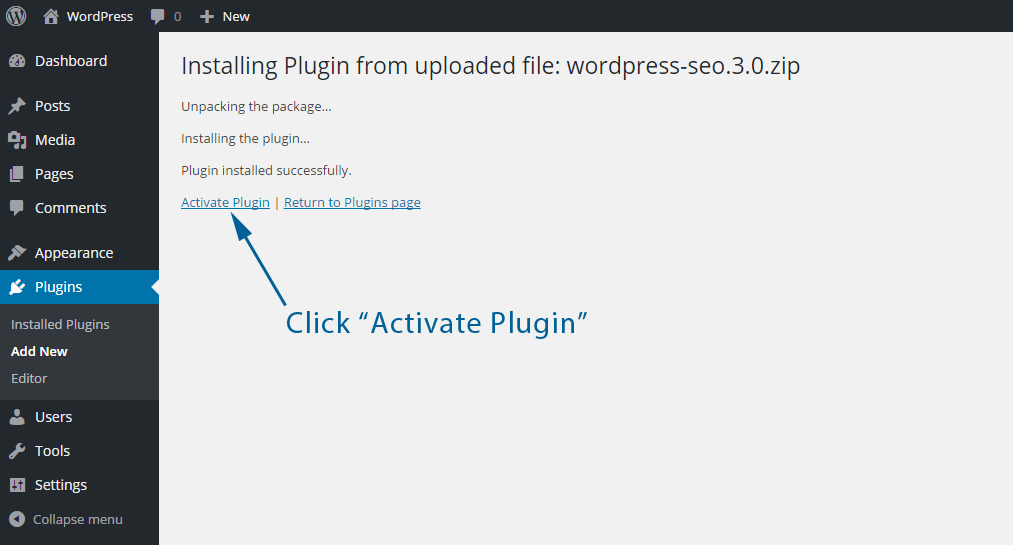
Step 4 - Uploading the WordPress plugin is ready (and you’ve also installed it).
Use FTP to upload a WordPress plugin
Uploading a WordPress plugin via FTP requires a bit more technical knowledge since you’ll need to login to your server via FTP. If you however follow the following steps carefully, uploading the WordPress plugin pretty much can’t go wrong. Before you start, you need to download the WordPress plugin, but in contrast to the previous method, you need to unzip it before you can upload it.
Step 1 - Unzip your plugin to your desktop (or a different location where it’s easy to locate):

Step 2 - Login to your server via FTP and navigate to the ‘plugins’ folder in your WordPress installation. Upload the entire folder you extracted in step one in that folder:
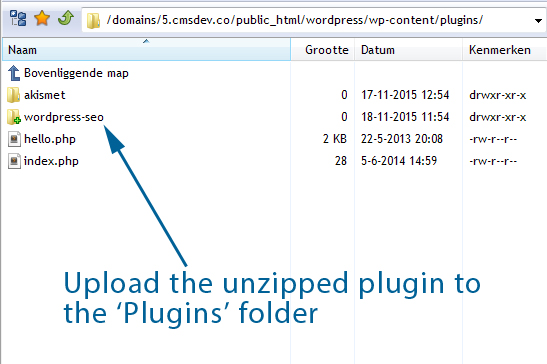
Step 3 - After uploading is ready, login to the admin panel and navigate via the left menu to plugins. You’ll see the list with plugins, containing the plugin you’ve just uploaded. Activate the plugin to start using it:
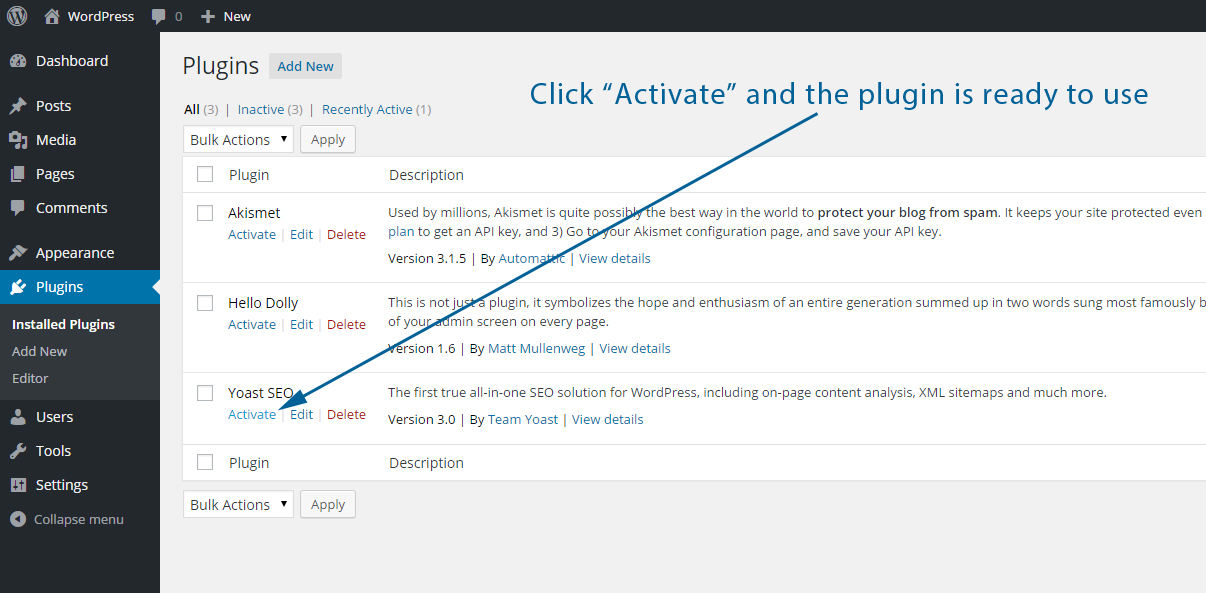
Step 4 - Uploading the WordPress Plugin via FTP was a success, you can now use the uploaded and installed plugin.


