
How to activate a plugin in WordPress
You can choose between thousands of plugins when you use WordPress as the CMS to maintain your website. If you don’t have much knowledge about maintaining a website, or ‘about computers in general’, then uploading a plugin, installing that plugin and activating/using that plugin can be a major hassle. This tutorial will learn you how to activate a plugin in WordPress, but before you can do that, you first need to upload/install the plugin to Wordpress.
You can activate the plugin as soon as you uploaded the plugin to your server. Login to the WordPress admin panel and navigate to ‘plugins’ in the left menu of your admin panel. You’ll now see a list of all available plugins. If uploading the plugin went well, you’ll see that plugin in that list:
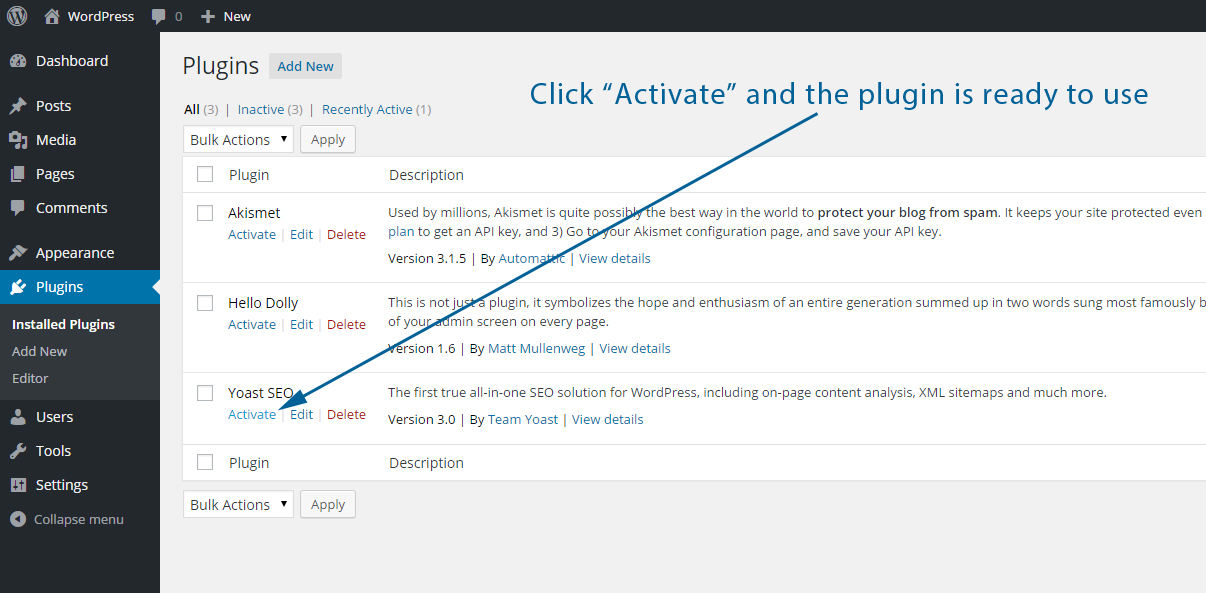
All you need to do now is go to the plugin that you just uploaded and click on ‘Activate’. WordPress will complete the installation of the plugin and you’ll get a ‘Plugin activated’ message if everything went all right (tip: always make sure you use a plugin that is compatible with your WordPress installation version and that is recently updated by the plugin developers so you can be assured that the plugin is safe).
In most cases the plugin can be configured via the settings menu at the left side of your admin panel.
Was this useful?


Resource categories
Share this resource
